Showing posts with label Baby 101. Show all posts

Monday, February 19, 2018

DIY: Two Fixes for a Motorola Video Baby Monitor that Stops Working

Video baby monitors have a remarkable tendency to break on you, which is a shame considering how expensive they are and how much parents rely on them!   We have a Motorola video baby monitor that we purchased in 2014, so it's well out of warranty.  It has worked great for the last 3.5 years and we added a second camera for baby M in 2017.  Our monitor is Motorola model MBP36BU (the model number is on the bottom of the camera), but the two fixes below should work for most Motorola video baby monitors (and maybe other brands as well. 

Fix #1 - Parent Console Stops Holding a Charge

About a year ago, the baby monitor stopped holding a charge.  It worked fine as long as it was plugged into the wall, but wouldn't hard a charge when running on battery power.  I'd charge it fully, unplug it to carry around with me while baby napped, and the battery would die way too fast - sometimes only 20-30 minutes from fully charged to completely dead.  Luckily, that is an easy and cheap (~$10) fix - you just need to replace the battery, which you can order inexpensively on Amazon.  This is the exact battery I ordered, which has held up well for over a year now.  Unscrew the battery cover on the back of the parent console, remove the old battery, and insert the new battery.  Problem solved!


Fix #2 - Parent Console Doesn't Recognize Charging Cable

I was NOT pleased when, this week, the parent console started not recognizing the charging cord being plugged in!  (The charge cord was plugged in, but the battery symbol in the top right corner didn't show that it was charging.)  This meant that, once the existing battery power was drained, the monitor couldn't be used either plugged in or running on battery power!  After talking to friends and reading online, I found that this is a common failure point - sometimes you can wiggle or prop the charging cord just right to get the monitor to recognize it, but it loses contact repeatedly, resulting in the baby monitor dying after the battery runs out.  

I am nothing if not stubborn, so I refused to resort straight to buying a new baby monitor!  Cue more research....apparently Motorola baby monitors in particular tend to have poor solder joints on the charge port; over time, repeatedly plugging and unplugging the charge cord over the years puts strain on and loosens these solder joints, eventually causing them to fail.  How long this takes varies depending on the quality of the original solder and the use of the baby monitor (how often the cord is plugged and unplugged from the parent console, etc.)  Apparently, at 3.5 years of daily use, ours lasted longer than many!  


Based on the symptoms, it sounded like this is what had happened to my monitor - the charge port had come un-soldered.  Before taking apart the monitor to confirm, I reached out to a local computer repair shop to see if they had someone who could re-solder the charge port if that was, indeed, the issue (emphasizing that it was a tiny part).  When he confirmed he could help, I then got brave enough to open up the baby monitor to take a look!  

Using a tiny Phillips head screwdriver, I first removed the plastic battery cover on the back of the parent console, removed the battery pack, and then removed the second screw located underneath the battery.  I then used a tiny flat head screwdriver to gently pry open the baby monitor along the seam around the outside edge.  This took a bit of finagling to locate exactly where the fasteners were located, but I was eventually able to gently pry the front and back of the baby monitor apart, revealing the circuit board.  As soon as I did this, a small part fell right out of the inside of the monitor - sure enough, it was the charge port!  The solder joints had come completely undone, resulting in the port being totally loose inside there - no wonder it wasn't working!  


I took the loose charge port and the disassembled parent console to the computer repair shop, where they re-soldered the charge port onto the circuit board.  I put everything back together again - snapped the 2 sides of the baby monitor back in place, and replaced the 2 screws and battery pack, and presto - the baby monitor now recognizes the charge cord!  This repair cost around $50 for the solder job; considering a new baby monitor system with 2 cameras would have run around $200, going the repair route was a significant cost savings, kept a baby monitor and 2 cameras out of the landfill, and saved me the hassle of programming and re-wiring new cameras!

Wednesday, September 13, 2017

Baby 101: Pumping Basics - Frequently Asked Questions


Pumping might be the thing friends ask me about the most - and completely understandably, because pumping can be tricky!  You've just barely got nursing figured out and then suddenly you go back to work / need to leave baby with a sitter / want to do anything for more than 3 hours without being tied to your baby, and pumping enters the mix.  I'm certainly no expert, but I went back to work after 12 weeks of maternity leave with my son and pumped successfully enough for him to be exclusively breastfed until he turned one (woohoo!), so I have some firsthand experience.  

Here are some of my tips and tricks for the questions I get asked the most:

What breast pump should I get?

This is personal preference, of course, but I love my Spectra S2 and prefer it to the Medela Pump In Style Advanced I used with my first - read more about the differences here.  

Don't run out and buy one - most insurance plans cover 100% of the cost of one breast pump per pregnancy.  Check with your health insurance company to see which DME (Direct Medical Equipment) supplier(s) they work with.  I used Aeroflow for both pregnancies (I got a new pump each time, since the motors can wear down) and had a great experience - they handled everything (insurance, contacting OB/GYN, etc.).

When should I start pumping?

I had a LOT of lactation consultant help with my first baby, and their advice was to wait to pump until baby is 2-3 weeks old.  The first couple of weeks (especially with your first!) are stressful enough with figuring out breastfeeding, and it can mess with your breastmilk supply if you start too early (causing oversupply, which can result in foremilk/hindmilk balance issues, engorgement, mastitis, etc.)  

By 2-3 weeks, your milk supply will start to regulate, you'll hopefully be through the painful/confusing/stressful part of breastfeeding and have time to add in pumping.  This timeline allows plenty of time to introduce a bottle to your baby between 3-4 weeks, which is the ideal window to ensure that your baby will accept a bottle without causing nipple confusion.

How often should I pump?

This depends on the reason why you're pumping.  If you're still nursing full-time and just want to build a small freezer stash for the occasional babysitter, I was advised to pump twice a day; once AFTER nursing (to get the extra out for a "rainy day" and tell your body to keep producing that much milk), and once INSTEAD of nursing (to allow you to feed the baby a bottle of pumped breastmilk and ensure they'll continue to accept a bottle).  

If you're going to be away from your baby (going back to work, traveling, etc. - i.e., NOT nursing full-time), you should pump the same number of times, on approximately the same schedule, as your baby will be taking bottles while you're gone - for example, if your baby will take 3 bottles every 3 hours during the time you're gone, you should pump 3 times, approximately every 3 hours.  Pumping less frequently than your baby is eating will tell your body to slow down milk production.

How long should I pump?

This varies depending on the individual and the pump.  I find that my Spectra pump is much more efficient at removing milk than my Medela PISA was, so I generally pump for about 12-15 minutes (as opposed to the 20-25 minutes I pumped with my Medela).  I pump until fully emptied (milk stops flowing), and then I press the "letdown" or "massage" mode button again to encourage a second letdown.  Many women naturally have a second letdown around the 12 minute mark, but you can use the letdown feature on your pump to try to trigger another one once milk stops flowing from the first letdown.  

After the second letdown, I pump until milk stops coming out, and then for an additional 2-5 minutes to encourage my body to maintain production.  If you're pressed for time, you can skip the second letdown and additional 2-5 minutes after milk flow stops, but you'll want to fully empty your breasts to avoid clogged ducts, mastitis, or an unwanted decrease in your milk supply.


What should I bring in my pump bag to work?


How do I know if I'm pumping enough?

This varies so much by person - there is a huge range.  If you're pumping in lieu of nursing, your goal is obviously to pump enough to replace the breastmilk your baby consumes by bottle during the same timeframe (so if your baby consumes 15 ounces of breastmilk while you're gone, you'll want to pump at least 15 ounces to stay "even").  "Normal" production from pumping in lieu of nursing is 2-4 ounces per session for both breasts combined.  

If you're pumping while nursing full time (to build a stash), you can expect your output to be much less - "normal" is considered 0.5-2 ounces per session for both breasts combined.

Keep in mind that milk production is normally higher in the morning than it is in the evenings, so you may see different outputs from pumping sessions depending on the time of day.  Also, remember that a baby is much more efficient at removing milk than a pump - your pumping output is not indicative of your milk supply.


What if I pump too soon to when my baby wants to nurse and there is none left?

Again, a baby is much more efficient at removing milk than a pump; even immediately after you pump, there is still milk remaining in your breasts that a baby can remove that the pump could not.  Also, breastmilk is constantly replenishing, so even as you finish pumping, your body is already producing more.  The milk flow may be slower than baby is used to and they may get frustrated, but don't worry that there isn't any left - there is.  Allow your baby to nurse longer and/or switch sides back and forth.


Why is the suction on my pump weak?

If you're not getting good suction on your pump, first make sure everything is plugged in / assembled correctly - the tubing is well secured, both to the pump and to the flanges, and there is nothing (bra/shirt) in between the flanges and your breast breaking the suction.  If you're only pumping on one side, make sure that you disconnect the tubing for the second side and use the little plug to "block" the tubing connection.

Double check the suction settings on your pump to make sure they haven't been accidentally adjusted.

If you're using battery power (rather than a wall plug-in), make sure the battery is fully charged and/or replace the batteries if using a battery pack.

Inspect the membranes (on a Medela PISA, these are the white rubber circles) or the valves (on a Spectra, these are the white duckbill parts) for any tears; it is good practice to replace these parts every couple of months anyway, because they weaken over time and they have a big impact on the pump's overall suction.  

I'm not pumping enough milk - how do I pump more?

First, make sure your expectations for pumping output are reasonable - see "How do I know if I'm pumping enough?" above. 

Next, make sure there aren't any suction issues with your pump - see "Why is the suction on my pump weak?" above.  You'll also get more milk out if you "prod" your breasts while pumping (some people say "massage", but I don't use motion - I just jab a finger or two into the breast tissue and hold them there while the pump is doing its thing, moving them every couple of minutes to trigger production from different ducts).

If you truly need to increase your milk supply, here is a detailed post on maintaining your milk supply.  In short:
- drink more
- eat more
- add galactogogues (fenugreek, brewer's yeast, oatmeal)
- pump more frequently
- pump longer / pump through 2, even 3 letdowns

Keep in mind that lots of things can impact your milk supply - time of day (milk production decreases in the evening), return of your period (my milk supply took a permanent hit when I got my period back at 7 months), illness, stress, and certain medications, including birth control.

If none of these things work, consider speaking to your physician about prescription medication to help increase your milk supply - Domperidone or Reglan.  I have no firsthand experience with these, but it's an option that's available if nothing else works.

My pumping output is vastly different between each breast, is this normal?

Yes, this is totally normal - many people have "a stud and a dud", where one side consistently produces more than the other side.  You may also switch back and forth between which side produces more based on which side the baby last nursed.  


Pumping is painful, is this normal?

Pumping should not be painful; of course, if you are engorged, there may be some discomfort from the engorgement, but there shouldn't be pain from pumping itself.  

Make sure that you're not setting the suction on your pump too high; contrary to logic, a higher suction setting does not guarantee more milk and/or quicker expression.  Slowly increase the suction to the point of discomfort, and then reduce it from there until you find the setting that is most comfortable for you.

You may also be using the wrong flange size if you're still experiencing pain; flange size is not related to breast size, so small-chested women may still require a large flange size, and vice versa.  Most breast pumps come with a "medium" 24 mm flange size, but there are both smaller and larger flange sizes available.  (Medela: 21mm24mm27mm30mm36mm; Spectra: 20mm, 24mm, 28mm, 32mm)  You can use the graphic below to gauge whether or not your flange size is appropriate (although I find this hard to do); a lactation consultant can help fit you to the right size, or you can try a few sizes (they're inexpensive, or you can borrow from a friend) and use trial and error until you find the best fit.

Image result for breast pump flange size
Via

You may also want to lubricate the inside of the flanges to reduce the friction - you can use coconut oil or lanolin cream (I like the Lansinoh brand).

How do I store pumped milk?

First, I always pump into bottles, rather than bags; some brands of breast pumps are compatible with breastmilk storage bags (allowing you to pump directly into a bag); however, these bags generally do not freeze flat, and the ounce measurements on the bags are not accurate since the bag is not a rigid storage container (making it difficult to accurately measure how much you've pumped).  I keep my pumped milk in a refrigerator at work (there is a dedicated mini fridge in the "wellness room"), although you can also use a cooler with ice packs if you don't have access to a refrigerator.

You shouldn't combine warm milk with cool milk; to combine milk from different pumping sessions, only combine warm with warm, or cool with cool.

I pump during the work week; Monday through Thursday, I use each day's pumped milk to supply the next day's bottles.  On Friday, I freeze the pumped milk in breastmilk storage bags, and on Monday, I thaw previously frozen breastmilk to make bottles.  Freezing Friday's pumped milk and using (older) thawed milk on Mondays keeps my freezer stash current.  Right now, I'm using Lansinoh storage bags; you can read a comparison of milk storage bags here.

Pumped milk is good at room temperature for 4-6 hours; refrigerated for 5 days (you'll be able to smell if it's spoiled), in a regular freezer for 6 months, and in a deep freezer for 12 months.  Read a more detailed post about milk storage (freezing and thawing pumped milk; rotating a freezer stash to keep it current, etc.) here.


How do I find the time to pump?

It is hard!  If you're nursing full-time, you probably only need to pump once or twice a day to have a small stash in the freezer.   Try utilizing baby's nap time or consider pumping one side while baby nurses on the other side.

If you're pumping during the workday, you have to guard your pumping time!  I block mine off on my calendar so the time will appear unavailable to my coworkers if they try to schedule a meeting.  I try to stick to my pumping schedule closely; if you start letting it slide (delaying or skipping pumps), your milk production can suffer (and people will learn that your designated pumping times are flexible - it's a downward spiral).  Another time-saver to consider is pumping while driving; I pump each morning during my commute to work, which saves me one pumping session out of the workday.  You can read more about how to pump in the car here.

I think having a hands-free pumping bra is a must-have; it will allow you to nurse, type, wash bottles, read, talk on the phone, etc. while you pump.  My favorite is the Simple Wishes brand.


How do I clean pump parts? 

The pump parts that require thorough cleaning are the flanges, membranes/valves (yellow/white parts), and obviously the milk collection bottles - all of the parts that come into direct contact with your milk.  Tubing does not require cleaning; if you notice milk (or worse, mold) inside the tubing, you should just replace it. It's a good idea to keep an extra set of tubing on hand (you can buy Medela-compatible tubing here and Spectra here).  If you see condensation inside the tubing, keep your pump running after you disconnect the tubing from the flanges to allow the tubing to dry.

You can read the CDC's recommendations for cleaning pump parts here.  In short, they recommend washing with hot water and soap, and then air drying (or washing in the dishwasher) after each pumping session.

I will admit that I do not follow these guidelines during the workday; I pump 3-4 times at work each day, and washing and air drying them each time is not realistic for me.  I store my pump parts in a sealed Tupperware-style container (this is the exact one I use) in the refrigerator between pumping sessions (I do not wash or rinse them first).  Some people use gallon Ziploc bags, but I don't like the idea of throwing out a Ziploc bag every single day.  Refrigerating the pump parts will slow the growth of bacteria on the pump parts in between sessions.  You do NOT want to keep the pump parts at room temperature between sessions, because bacteria will grow too quickly on the residual milk on the parts.  While refrigerating pump parts in between sessions is a widespread practice, it is not something I would recommend for a premature or immune-compromised baby.

I wash my pump parts each evening, either with hot water, Dapple bottle soap (rinses clean faster than normal dish soap), and a bottle brush, or in the dishwasher, and then air dry them on a drying rack (I use the Boon grass).  


How often do I need to sterilize pump parts?

I sterilize infrequently - when the parts are new (or coming out of storage for another baby), after illness (to kill any germs that survive the normal washing process), or when I'm traveling and unable to wash and dry the parts as well as I do at home (e.g., washing in hotel room bathroom sinks).  When new, I sterilize pump parts in boiling water for 5 minutes; for all future sterilizing, I use the Medela microwave steam bags, which are great - each bag (5 come in a box) allows for 20 uses, so one box = 100 sterilizations.  

If you have a premature or immune-compromised baby, your doctor may recommend sterilizing more often; for a healthy baby, daily or even weekly sterilization is not necessary.  Think about it - are your breasts sterilized when your baby nurses?


How do I handle pumping when I'm traveling?

This was intimidating to me at first, but I quickly learned the ropes and took numerous business trips while pumping for my first child.  In short, know that the TSA allows you to fly within the US with an unlimited volume of pumped breastmilk.  Read my detailed post on this topic here.


Do you have more questions about pumping that weren't addressed here?  Leave a comment and I'll add it to this post!


Monday, September 4, 2017

DIY: Faux Chenille Baby Blanket Tutorial


I made one of these faux chenille blankets when I was pregnant with my son and used it as the backdrop for all his monthly baby pictures; despite the time-consuming process to make it, I wanted my daughter to have one of her own (#secondchildequality).  It's a good thing I'm not planning to have a ton of kids because I'm not sure how many more of these blankets I have in me, but I LOVE the end result and hope it is something my kids will keep forever.

Let me begin by saying I am VERY beginner-level at sewing.  I haven't sewn anything since my last pregnancy, so....nearly 3 years of complete inactivity.  This blanket really only requires the ability to sew in straight lines, so if you can do even the basics on a sewing machine, you can do this!


 Supplies:
  • 1.25 yards patterned fabric
  • 3 x 1.25 yards 100% cotton flannel (solid colors)
  • 2 x 250-yard spools thread that matches the patterned fabric (plus a 3rd spool of thread if your quilt binding is a different color)
  • 2 x 3-yard double-fold 0.875-inch-wide quilt binding
  • Fabric marking pencil
  • Yard stick
  • Safety pins
  • Straight pins
  • Slash cutting tool

First, fabric selection: you will have one patterned fabric that will be the "front" of the blanket, and then 3 colors of cotton flannel will be used to make the faux chenille texture.  The "front" patterned fabric can be whatever fabric content you want (mine happened to also be cotton), but the 3 colors of flannel MUST be 100% cotton in order for it to fray properly.  The flannel doesn't have to be solid colored, but any pattern on it is not really going to show up once you cut the chenille, so solid is usually easiest and cheapest. If you're going to spend money somewhere, spend it on the "front" patterned fabric and get cheaper solid flannel for the chenille.  My front fabric was $12.99/yard and the flannel was $2.99 yard, for reference.  The flannel colors you choose should coordinate (or contrast) with the "front" patterned fabric.  Similarly, the thread color should coordinate with the fabric (especially the "front" patterned fabric) so that it blends in and hides mistakes/wonky lines.  The quilt binding can either match or contrast your other fabrics, depending on your preference.

For this blanket, I used a pink-patterned floral fabric for my "front" patterned fabric, and 3 varying colors of pink flannel for the chenille.  I used pink thread and navy contrasting quilt binding (note: if you use contrasting, rather than matching, quilt binding, you will need a 3rd spool of thread in a color that matches the binding).  By using 1.25 yards of each fabric, you should end up with an (approximately) 45-inch square blanket.

The first step is prepping the fabric.  I do not wash mine in advance because I am brave/lazy like that and do not like trimming all the threads that come loose if you pre-wash.  You run some risk of shrinkage in the finished product this way, but I did it anyway.  Lay the "front" patterned fabric upside down (wrong-side facing up) on the ground.  On top of it, layer the 3 solid-color flannel fabrics.  The color on the very top (furthest from the "front" patterned fabric) is the color that will be most visible, so put your preferred fabric color on last.  Use scissors to trim any uneven edges if your fabric doesn't line up perfectly.


Use 10-12 safety pins to pin the 4 layers of fabric together, since the fabrics will shift some while you are sewing.  Since this is a project that will likely take several days to complete, I like to use safety pins instead of straight pins since they are more secure.  


Flip your pinned fabric over and use a yard stick to draw a straight line with a fabric marking pencil from one diagonal to the other.  This will be the first line you sew, and you will work your way outwards to the corner.


Finally - time to start actually sewing!  You will go through many, many bobbins of thread while making this project, so I like to thread at least 3-4 bobbins at a time to limit the number of times I have to stop sewing to rethread bobbins.  Make sure to sew with the "front" patterned fabric facing up, because the stitching on this side will be more visible than it will be on the back/chenille side, so you want to make sure you aren't bunching the fabric.  Start by sewing a straight line from one corner to the other on the pre-marked line.  This is the longest line you will have to sew, so they get shorter from here!  Backstitch at the beginning and end of each line to avoid unraveling once you start cutting the chenille.

After completing the first line, shift the fabric to the right so that the right edge of the presser foot is aligned with the line you just sewed.  I find it helpful to roll up the excess fabric to keep it from bunching too much against the machine.  Sew another line, keeping one-presser-foot distance from the first line.  


Keep doing this, sewing lots and lots (...and lots) of straight lines until you eventually reach the left-hand corner of the fabric.  When you reach the corner...you are halfway done!  Turn the blanket around (with the "front" patterned fabric still facing up, but moving the completed half to the right-hand side and the uncompleted half of the blanket on the left) and do the same thing for the other half of the blanket.  If you run out of thread in either the spool or the bobbin mid-line, don't worry - just reload, backstitch, and keep going.  There will be so many lines that it won't be noticeable in the finished product :)

Once you are done sewing lines, it's time to start cutting the chenille!  You will want a slash cutting tool for this part - trust me!  I can't even imagine cutting this many lines with scissors.  

Place the blanket on the ground or flat surface with the flannel side facing up.  You want to cut the 3 flannel layers in between each line WITHOUT cutting the "front" patterned fabric.  I find it easiest to use a small pair of scissors to snip the flannel between each sewed seam to "start" the cut - it makes it easier for the slash cutter to do the rest of the work without having to pull too hard.  

Then, stick the slash cutter under the 3 flannel layers (but on top of the patterned fabric) and push the tool, parallel to the ground, towards the other end of the blanket to cut through the flannel layers.  Cutting 3 layers of flannel at once, many, many times (between each pair of lines) will dull the slash cutter blade quickly, so when it starts becoming more difficult to push the tool to cut the fabric, make sure to rotate the blade to reveal a "fresh", sharp section of the blade (if you don't do this and use a dull blade, you will eventually use so much force to push the tool that you will rip out a seam).  You will also have to pick flannel lint out of the blade every few cuts to keep the blade from getting clogged up.


Once you have cut the flannel between all of the lines, use a yard stock to "square up" the edges of the blanket and trim off any excess fabric (since it likely shifted some during sewing), including the fabric selvage on the "front" patterned fabric.  Don't worry if trimming involves cutting off some of the backstitching on the lines you sewed - the quilt binding will ensure that the seams don't unravel.  


If you want your blanket to have rounded edges like mine, use a rounded object (I used a salad plate) to trace and then cut a rounded edge on each corner.  Trim off any remaining loose threads.


The last labor-intensive step - the quilt binding!  Use straight pins to pin the quilt binding around the outer edge of the blanket, making sure to sandwich all 4 fabric layers between the 2 sides of the quilt binding.  


If your binding is a contrasting color, make sure to rethread your sewing maching with an appropriate thread color to blend in (my beginner sewing skills make sewing on the quilt binding the hardest part of the whole process, so I like to hide my mistakes as much as possible with thread that blends in!)  Use your sewing machine to sew along the inner edge of the binding - as close as possible to the edge while still "catching" the binding on both sides of the blanket (I check the back side every few inches to make sure my seam isn't running off the binding).  This part is very slow and steady for me, and involves a lot of seam-ripping and re-doing, especially when going around the rounded corners (but again....beginner-level skills).  


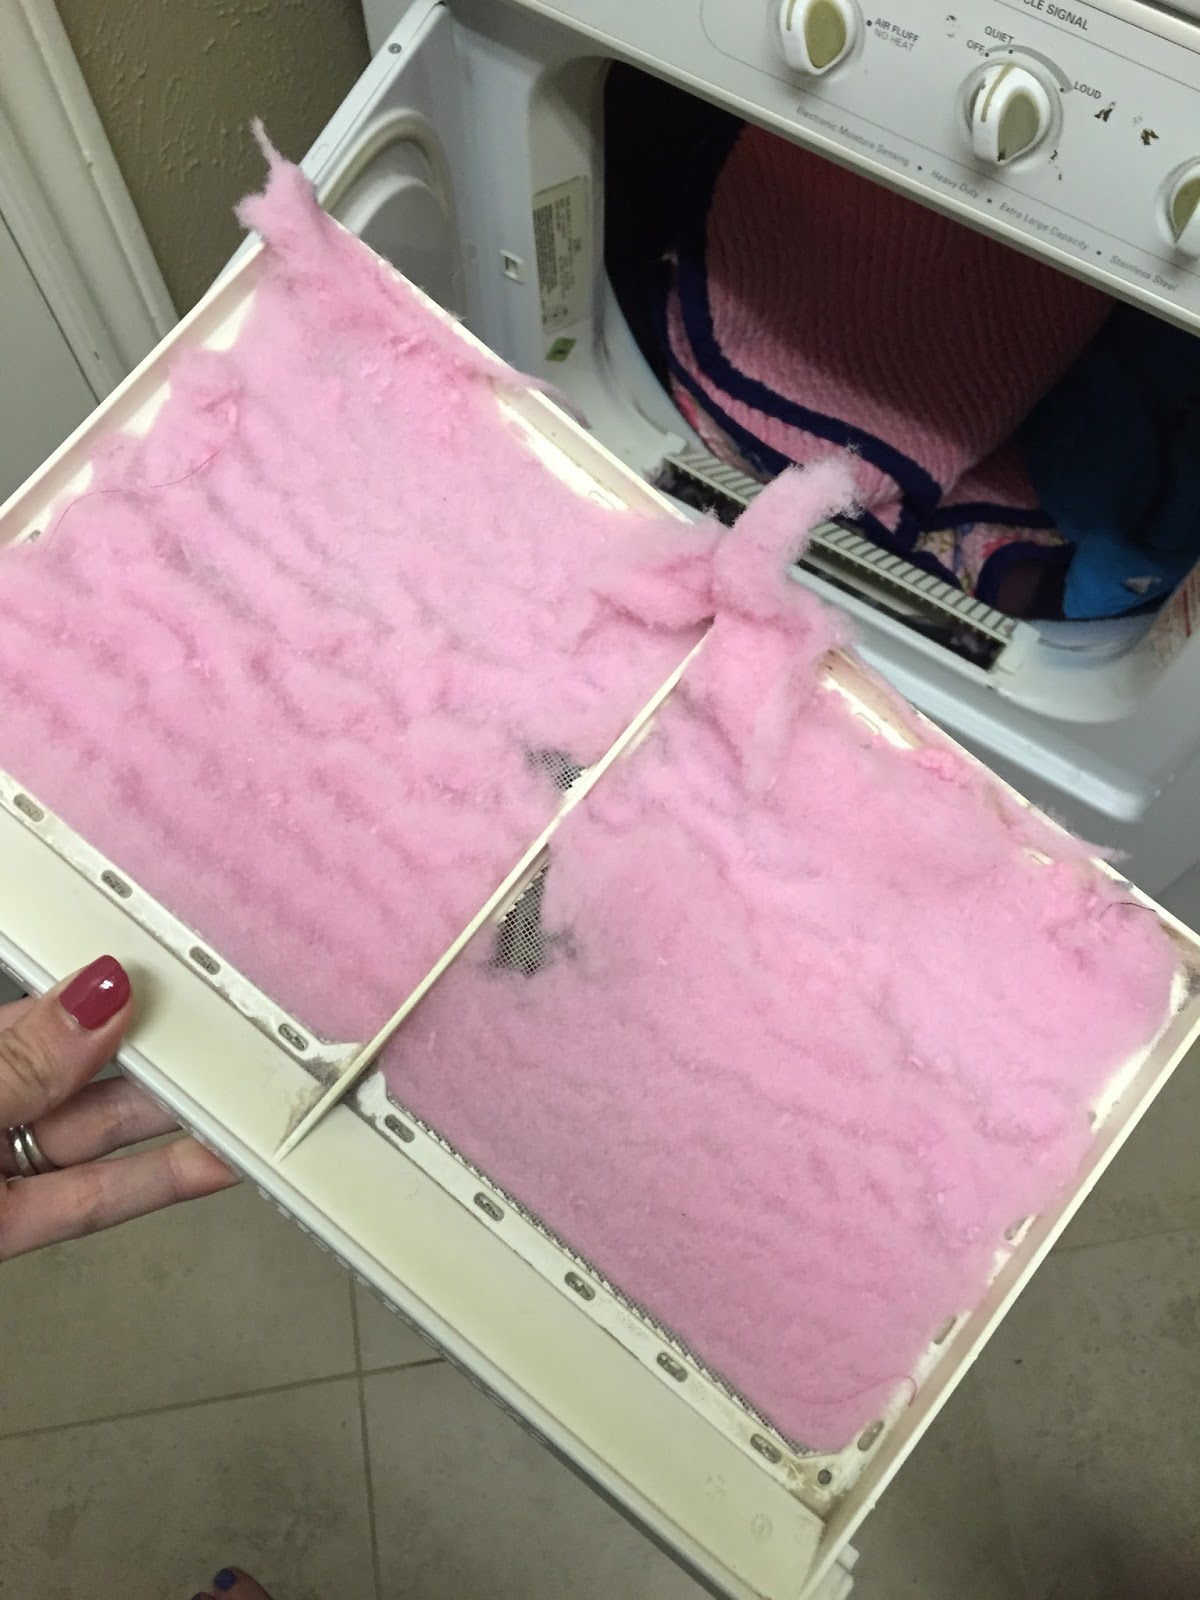
Once you're done, double check the binding to make sure that there aren't any gaps in the seam all the way around.  When you're satisfied that the edges of the blanket are fully encased in the quilt binding, it's time to wash!  Wash the blanket (a regular wash cycle on cold water should be fine).  Because I didn't pre-wash my fabric before sewing, I use a Shout Color Catcher sheet to soak up any dyes that might run during washing.  Make sure you wash the blanket BY ITSELF - the cut flannel will generate a huge amount of lint that you don't want sticking to other things in the same wash load!!  Machine dry the blanket on low or medium heat; if you remember, clean out the lint filter halfway through the drying time because IT WILL BE FULL.  Like, really full.


When the blanket is dry, admire all the flannel that has fluffed up into a soft chenille texture!  You did it!  It may be time- and labor-intensive, but the end product of seeing all those lines of chenille is worth it!


Wednesday, August 23, 2017

Mom Hack: Clothesline + Sun = Ultimate Stain Remover

 Oh, laundry.  It NEVER ends.  Add to that the fact that both of my kids are/were MAJOR spitter-uppers, and the quantity of stained clothing/bibs/blankets/sheets/burp cloths is insane.  It wasn't so bad during the first 6 months when it's just milk spit-up, but ever since baby food and solids came into the picture (and even now, in the preschool years), we have had a ton of hard-to-beat stains.  I tried lots of Pinterest tricks - rubbing the stain directly with Tide or Dreft detergent, Oxiclean spray, soaking in hot water with Oxiclean powder, Dawn + hydrogen peroxide + baking soda, etc - and they worked fine on surface-level or fresh stains but couldn't get out the tough stains, particularly red and orange ones - carrot puree, ketchup, spaghetti sauce, and the like, or - the worst - baby poop stains!

Enter: the sun.  The sun gets out ALL kinds of stains, but especially the tough ones!  Anytime I have stained laundry, I do my standard Oxiclean-spray-and-launder; if the stain is still there after a wash cycle, I let the sun do its thing - I just set the (wet) item in direct sunlight, and the sun bleaches out the stain (while not affecting any colored fabric or graphics).  Initially, I laid the stained clothes on our patio dining table, but then (since those got the clothes dirty again from sitting on an outdoor table) I'd have to rewash them after the sun got rid of the stain.  Also, in the height of the baby food stain stage, I didn't have enough surface area on our table for all the stained clothes!  


I eventually invested in an inexpensive clothesline; it is retractable, so when it's not in use, it's unobtrusively hidden by a gutter downspout in our backyard (B's biggest hesitation with getting a clothesline was that it would be visible all the time).  


I also bought wood clothespins and this hanging clothespin bag, which hangs on the clothesline for easier access to pins while I'm hanging up or taking down laundry (instead of bending down to get them out of a basket on the ground).  


This has saved me SO much time and energy using different stain removal products, scrubbing stains with a toothbrush, and washing and re-washing - now, the stains are gone by the time the item dries in the sun!

Have you tried using the sun to get rid of tough stains?  Try it, you'll be amazed!

Wednesday, August 9, 2017

Buy This, Not That: Breast Pumps


Good:  Medela Pump In Style Advanced

After C was born in 2014, I got a trusty Medela Pump in Style Advanced breast pump (thanks, Obama!), which I used religiously 3-4 times a day at work for a year.  At the time, I had no complaints...but I also had nothing to compare it to.

Better: Spectra S2

This year, when I was pregnant with M, I had to decide which breast pump I wanted to order this time around.  (Although I still have my old Medela PISA, the motor can wear out, and since a new one was fully covered by my insurance, I knew I wanted to get a new one - even if it was another PISA).  I read a ton of online reviews, and the consensus seemed to be that the Medela PISA and the Spectra S1 or S2 pumps were the current favorites. Medela is still the better-known brand (as it is what most of the hospitals use, and has been around in the US longer than Spectra); however, every single review I read that compared the two preferred the Spectra.  

I decided to take a chance (knowing I had my old PISA if I absolutely hated the Spectra), and I am sooooo glad I did!  I ordered the Spectra S2, as the cost was completely covered by my insurance; the S1 had an upgrade charge since it has a built-in rechargeable battery (while the S1 has to be plugged into an electrical outlet).   

In comparison to the Medela pump, my Spectra pump is much quieter, gentler, and more efficient.  The difference in noise is the most remarkable -- the Medela pump was loud, and the Spectra is whisper quiet.  We can easily watch TV while I pump, and although my work has a dedicated pumping room, I think I could easily be on a phone call while the pump was running (NOT TRUE for the Medela!)  

I also think the suction on the Spectra is gentler -- probably because it is more customizable than the Medela.  While the Medela has one dial that can adjust the suction strength, the Spectra can adjust both the frequency and the suction strength.  The Spectra pump has a digital display and remembers your settings so that you don't have to reset them every time you use the pump; you can set frequency and suction strength for both the "let down" mode and the "expression" mode.  I also like that the Spectra pump has a built-in timer so that you can easily keep track of how long each pumping session lasts; I've noticed that the Spectra pump seems to be more efficient than my Medela was.  With my Medela, I frequently pumped for 20-25 minutes; with the Spectra, it usually only takes 10-12 minutes to fully empty my milk.

I also like that the Spectra pump is a fully closed system, meaning that it can be safely shared among users or passed down to friends/family without risk of contamination.  The Medela pump is not a closed system and, while plenty of people share or pass down their pumps, technically you're not supposed to.  

There are 3 downsides of the Spectra pump: (1) the lack of local availability of compatible parts; my local baby store and Target stock standard Medela pump supplies but not Spectra supplies, so if you forget to bring parts while traveling or something breaks, you're up a creek.  (2) The Spectra pump parts also are not compatible with standard-sized bottles, and (3) the flanges do not come in as many different sizes as the Medela flanges do.  

However, there is a cheap and easy fix for all of these issues -- I use my old Medela parts with the Spectra pump.  Since I use a larger flange size than the standard-issue flange, I use my larger Medela flanges instead of the smaller ones that came with the Spectra pump.  Doing this not only solve my size issue but also ensures that I should be able to acquire Medela parts locally if they break or I forget them (as long as I remember the Spectra pump, tubing, and backflow protector, I'm good!)  Since the Medela pump parts are compatible with standard-sized bottles, this also allows me to use my existing bottles without having to buy new wide-mouth bottles or adapter rings to use the Spectra.  Read my post here for how to use Medela parts with a Spectra pump.

Wednesday, August 2, 2017

How to Use Medela PISA Pump Parts with a Spectra S1/S2 Pump

Between baby #1 and #2, I made the switch between the Medela Pump In Style Advanced to the Spectra S2 breast pump.  While I MUCH prefer the Spectra pump to the Medela, I had 3 issues with the Spectra pump:

1) Spectra flange sizes are limited (only 3 sizes as compared to Medela's 5), and I use a larger-than-standard flange that Spectra doesn't make;
2) Replacement Spectra pump parts are not readily available locally, making me nervous if they break or I forget them while travelling
3) Spectra pumps are not compatible with standard-size bottles - you either have to use wide-mouth bottles or use bottle adapters to allow use of standard-size bottles

The cheap and easy solution to all 3 issues is to use Medela pump parts with the Spectra pump.  Luckily, I had leftover pump parts from my old Medela pump that I could scavenge, but if not, Medela pump parts are inexpensive and readily available, both online and in local stores like Buy Buy Baby, Babies R Us, and Target.

I had heard anecdotally that it was possible to mix and match Medela parts with the Spectra pump, but I couldn't find detailed instructions on how to actually DO it.  Here's what you'll need:


The backflow adapter connects the Spectra backflow protector to the Medela PersonalFit Connector, allowing use of the Medela parts while staying a "closed" (sanitary) breast pump system.  You can buy a 6-pack of the adapters inexpensively on Amazon, and you're good to go!

Thursday, January 19, 2017

Surviving the Stomach Bug (and How to Kill Norovirus)

We made it over a year without a round of the stomach bug in our house, but...the jig is up.  As awful as it is, at least we know what we're doing now and can hopefully prevent it spreading to the rest of the family!  I got a call from school this morning that C was sick, so I made a quick stop by CVS on my way to pick him up to pick up the missing supplies in our go-to stomach bug arsenal:


CVS-brand Dye-Free Strawberry Pediatric Electrolyte (aka generic Pedialyte)


I'm not sure why, but the actual Pedialyte brand does not make a flavored (strawberry/grape/whatever) version that is dye-free.  C is not interested in drinking the unflavored variety, which is the only dye-free version that Pedialyte makes, and since the whole point is to ensure he stays hydrated...I buy the flavored kind.  The flavored Pedialyte brand products are all dyed purple or pink, and when I have a pukey kiddo, the last thing I need is dye making the clean-up/stain removal process even harder.

For rehydration purposes, a kiddo should drink 1 ML of Pedialyte per kilogram of body weight every 5 minutes for 3-4 hours.  Since C weighs 11 kg, this is 11 mL of Pedialyte every 5 minutes.  I use the little medicine cup that comes with Children's Tylenol to measure it out, and set a 5-minute timer on my phone.

Cheerios


Bland, starchy, easy on the stomach.  I think toast or saltines are the more conventional choices, but C isn't interested in eating those.  When he was a baby, I used puffs as our stomach bug starch of choice, but now it's plain Cheerios.


Applesauce Pouches


Another easy-on-the-stomach (and hydrating) food to try once it seems like his little stomach can handle some food.  These are from Costco, but they sell them pretty much everywhere now.  Normally, I buy the single-serve applesauce cups for snacks (since they are cheaper), but for stomach bugs, I buy applesauce pouches.    It's one less utensil contaminated with stomach bug germs, and they're mess-free for him to eat on his little sick-bed pallet on the floor.


Disinfectants


I learned this the hard way with the first stomach bug that ravaged our house -- many "disinfecting" products do not kill norovirus, which is the common culprit of stomach bugs.  Normal Lysol and Clorox wipes, as convenient as they are, do NOT kill norovirus.  The spray version of Lysol says it kills stomach bugs, but the surface has to remain wet for 5 minutes for it to be effective, and the fine aerosol Lysol mist usually dries before that. 


The easiest solution is plain old bleach, diluted with water in a spray bottle.  I use "concentrated" household bleach and a ratio of 1 part bleach to 20 parts water (I generally use 1 tablespoon of bleach to 20 tablespoons, or 1.25 cups, of water).  Bleach deteriorates over time, so if your bleach is old, you might consider investing in a new bottle for maximum effectiveness - bleach is cheap!  I spray this on EVERY hard surface that may have been touched, breathed on, or vomited on - floors, counters, cabinets, light switches, TV remotes, door handles, toilets, tubs, sinks, toys, etc.  Again, you want to make sure the bleach solution has ~5 minutes to work its magic, so I douse things with the solution -- it's not a light spray, I make sure the surface is totally wet.  If it's something that will come in direct contact with food or someone's mouth, I rinse with water (AFTER the solution has dried) before using it to eat or drink.

For times that I don't want to mess with mixing a bleach solution, or for surfaces I don't want to spray bleach on, I use Clorox Healthcare products, which are EPA registered to kill norovirus.  Note that this is different from the Clorox spray or Clorox wipes you can buy at the grocery store or Target!!!  You can't buy these products locally, so I like to keep them on hand IN ADVANCE of a stomach bug hitting my house.  Specifically, I like the Clorox Healthcare wipes and the Clorox Healthcare spray.  These products are hydrogen peroxide-based (again, this is not the same as the hydrogen peroxide you buy in the brown bottle at the drugstore!).

I try to minimize the contact C has with non-washable soft surfaces (e.g., area rugs, carpet, furniture).  I make him a pallet on the floor of multiple layers of blankets and/or towels to try to contain the contaminated area....that way, I can throw them all in the washer (on hot! Maximum length cycle! and machine dry!) along with any clothes, stuffed animals, rags, or other bedding, if they get soiled.  I make his pallet setup directly in front of the TV to entice him to stay on it (a a kid who gets very little screen time, he will stay glued to the TV on sick days!)


I'm crossing my fingers that this stomach bug will pass quickly and that no one else will catch it!  
09 10