Tuesday, November 3, 2015

A Day in the Life: 15 months

I love love LOVE day in the life posts...I love reading other people's to get a glimpse into what other people do all day, and I love looking back at my own to remember what this season of life was like with a 15-month-old C.  I almost always pick Wednesdays, my day off, since I'm home with C all day and that makes for a much more interesting day and better photos!  These were taken on September 30.  Blair was out of town for work, so I was flying solo all day.

6:45 AM - I wake up without an alarm since I'm used to getting up earlier than this for work.  I normally leave the house at 6:30 so I can be at work by 7, so 6:45 is "sleeping in".


7:35 AM - C has slept in this morning!  (He's normally up between 6:15 and 6:45.)  He yells in his crib until someone comes in to get him, and then he's all smiles.  I get him up and change his diaper, and then he's impatient and wanting breakfast.


7:53 AM - C's eating his typical breakfast of 2 homemade whole wheat waffles (from the freezer), whole milk, and a banana.


8:14 AM - C plays (pants-less, apparently) with his train in the nursery while I box up all of my maternity clothes.  (I had let a friend borrow them and she had just returned them, so time to pack away!)


8:23 AM - Another diaper change and C gets dressed for the day.  It's ridiculous that it's well into the fall and it's still warm enough in Dallas for him to wear shorts!


8:28 AM - I get the stroller ready to go on a walk and find C eating stale Cheerios out of the stroller storage area.  Great.  I grab a KIND bar to eat for breakfast on my walk.  I do not know what/if I would consume food as a mom if it weren't for KIND bars.  On Wednesdays and Fridays, when I'm home with C but Blair is at work, I eat a KIND bar for at least 1, if not 2, meals.  At least they're healthy-ish?


8:40 AM - I throw on some workout clothes and we're out the door at 8:43.  We take a 3.5 mile walk around the neighborhood.  I love using Map my Fitness to GPS our walks, mostly because I can them compare it to my Fitbit which drastically undercounts my steps and feel justified (I NEVER hit 10,000 steps in a day, even when I take a 5-mile walk!)  


9:49 AM - An hour later, we are home.  C fell asleep on the walk and I manage to transfer him from the stroller to his crib to continue his nap.  Woohoo!  I can shower alone!

10:48 AM - C is awake from his nap and ready to party!


10:54 AM - We play in the playroom for a while.  C loves toys that play annoying music at this age.  He also has the attention span of a gnat so he plays with each toy for approximately 12 seconds before moving on to the next one.  He cracks me up!  


12:07 PM - time for lunch (for C, that is).  I make him a veggie burger (his favorite), whole wheat macaroni, and mixed frozen vegetables.  


12:33 PM - C is snoozing for another nap.  He still takes at least 2 naps a day at this age, a short morning nap and a long nap from noon to 3-ish.    


12:38 PM - Somehow, our kitchen looks like this after every. single. meal. that C eats.  How can such a small person create so many dirty dishes?!  I tackle the messy counter and wash all the dishes.


12:47 PM - time for my own lunch (a day I DIDN'T eat a KIND bar for lunch!)  I make myself a veggie burger and a honeycrisp apple (the best!!!)


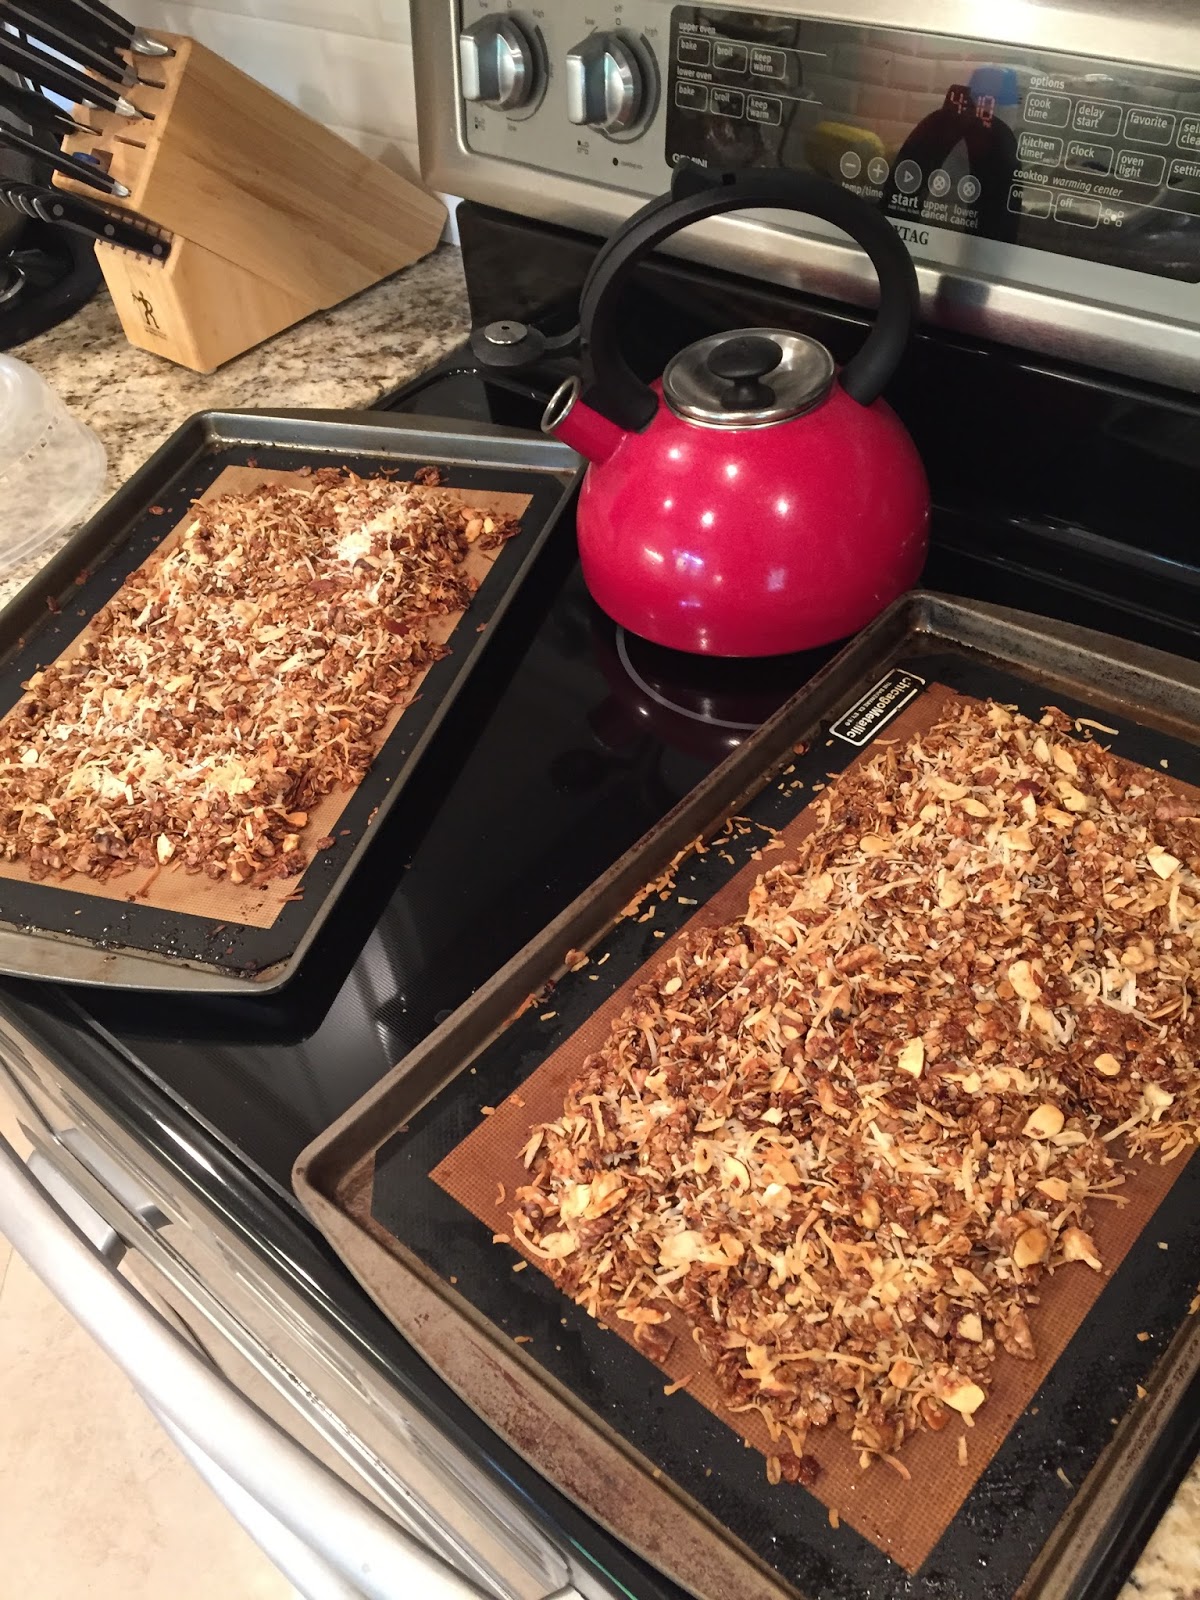
1:28 PM - time to fold some laundry that I started at some point earlier during the day.  Laundry never ends.  I try to do at least 2 loads on Wednesdays while I'm home.  After I start another load of laundry, I make a huge batch of homemade granola.


4:07 PM - C's up from his nap (3.5 hours!)  I love how much he loves his lovey and cuddles it while he sleeps.  We don't let him have his lovey or his paci except while he's napping/sleeping - when we pick him up out of his crib, he immediately drops both into his bed.


4:11 PM - the granola is done baking, so I take it out of the oven to cool while C plays in the playroom.


4:19 PM - time to run errands! My little partner is buckled up in the backseat ready to go buy groceries.


4:58 PM - we're leaving Kroger, groceries in cart.  C loves going to the grocery store and people watching.  He is turned around like this almost the whole time we shop!


5:31 PM - in the checkout line at Sprouts.  Yes, 2 grocery stores.  I tend to buy most of our produce at Sprouts because the selection and the prices are better than Kroger.  


6:15 PM - On our way home, we swing by a neighbor's house to purchase her hand-me-down PJs that she left out for us on her porch.  I love Facebook garage sales!  


6:41 PM - I put C in the playroom (with the baby gate) for a couple of minutes so I can make his dinner without him completely flipping out on me.  So instead he throws a fit in the playroom as if he hasn't eaten in months and is literally starving to death.  Toddler dramatics at their finest.


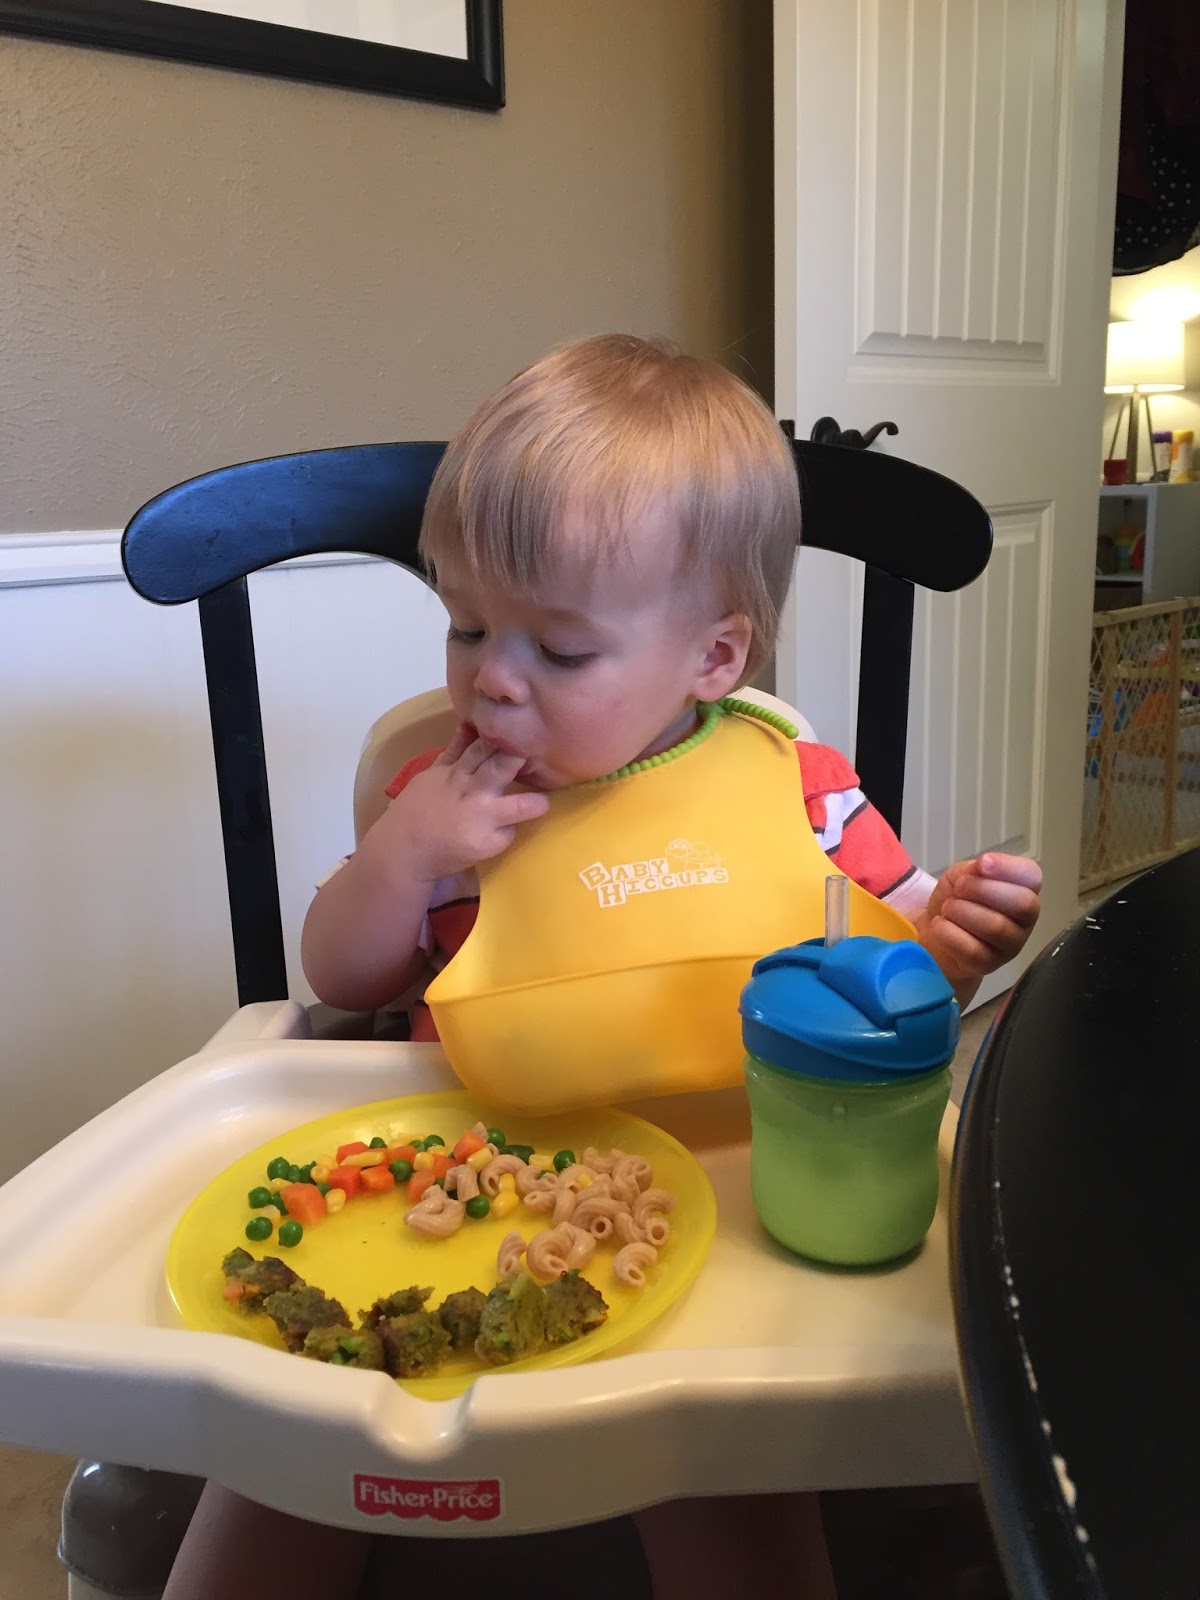
6:44 PM - C is FINALLY (ha) eating dinner.  He has not been into vegetables lately ever since he got a stomach bug, so I have taken to hiding/mixing them into his other food that he will eat.....hence this lovely creation of pasta/tomatoes/avocado/chicken/broccoli.  Yum?


7:16 PM - bathtime!  Yes, he's still in the baby tub.  Everyone makes fun of this.  It is so much faster than filling up the big tub!! Plus it is easier for me to wash his hair with him lying down in the baby tub.  I dread the day he (completely) outgrows it!


7:42 PM - lotion, PJs on, teeth brushed, prayers said, and bed with his paci and Lyle, his lovey.  We are so lucky how easily he goes to bed!  We turn off his light, turn on the sound machine, and he rolls over with Lyle and goes to sleep.


9:34 PM - I basically crash on the couch every night after we get C to bed....and I'd like to say that this terrible excuse for dinner is abnormal because Blair was out of town, but the reality is that we eat something like this for dinner at least a couple of times a week, just because we are too exhausted to think about cooking something more real.  I cut up another honeycrisp apple, along with some cheese and wheat thins.  Dinner of champions!


10:23 PM - I always peek in on C before I get in bed, and most nights I take a picture on my phone (the flash doesn't phase him) so I can see how sweet he looks sleeping!  I have dozens upon dozens of these pictures on my phone....so sweet!  After that, lights out and I'm asleep within 15 seconds of my head hitting the pillow!


 These days are busy but so fun!! I love this age and have so much fun hanging out with this little boy on Wednesdays - the perfect mid-workweek break!


Wednesday, October 21, 2015

Halloween Fun: Frankenstein footprint craft + printable template

I am ALL ABOUT the adorable baby handprint and footprint holiday crafts!!  Do their tiny hands and feet EVER get old?!  We've done the footprint ghost craft a couple of times (just white footprints on black paper, add eyes and mouth, done), so I wanted something different for a recent October toddler play date.  I think these footprint Frankensteins are adorable!!


 Having made way too many handprint and footprint crafts in C's short 15 months on this earth, I like to think that I have it figured out.  I use washable, non-toxic tempura paint (this is Sargent Art brand from Hobby Lobby - $1.59 for a good-sized bottle) and a mini foam craft roller (also from Hobby Lobby) to apply the paint to their little feet.  The foam roller results in a nice, even application of paint and gets it done much more quickly than applying with a paint brush (and dipping their feet into a plate of paint makes it way too gloppy).  I've used a cheap foam paintbrush too, and it works, but it takes longer and the paint isn't as even.


Other than paint and some way to apply it (foam roller, paintbrush, etc), all you need is white construction paper or cardstock, a black Sharpie, a white paint pen or liquid white-out, and a silver Sharpie!  (If you don't have a silver Sharpie and don't want to buy one, you can just do the ear things in black instead of silver).  

This craft is pretty easy and you can embellish it however you want -- we chose to write "Trick or Treat" on ours.  I've included a printable of the "Trick or Treat" design below - just print it on white letter-sized paper and get going with your Frankenstein footprint-making!

Monday, October 19, 2015

Halloween Fun: BOO Poem and Ghost Printables

One of my favorite parts of Halloween as a kid was our neighborhood's tradition of leaving anonymous Halloween treats on each other's front porches with a "BOO" sign and corresponding poem -- it's a great way to spread Halloween cheer among your neighbors and, as kids, we loved "sneaking" up to a neighbor's front porch to leave their goodies for them to find.

I thought this was a tradition that all kids grew up with and was surprised when my husband wasn't familiar with it.  Basically, someone starts the process by leaving a bag or basket full of Halloween/fall treats on 2 neighbors' front porches, along with a poem that instructs the recipients to each do the same for 2 additional neighbors within 2 days.  The recipient places the "BOO" sign on their front door or front window so that other neighbors know they've already been "BOO"-ed, so that they don't get picked twice.  If everyone plays along, you can spread the Halloween cheer to over 250 neighbors within 2 weeks!!  It is fun for kids to design the "BOO" sign for their neighbors and do the "sneaking" to leave the bag or basket on the front porch, and it is fun for everyone to see the tradition spread from house to house as more houses bear "BOO" signs on their front doors or windows!


The goodies you include in the bag or basket can vary depending on the age / size of the family you're BOOing.  When we were kids, the bags were normally mostly candy or Halloween cookies....sometimes there was even a bottle of wine or a couple of beers for Mom and Dad!  Since most of the families in our neighborhood have toddlers who are too young for candy, I didn't want our bags to be too candy-heavy; instead, I filled them with Halloween stickers, a Trader Joe's pumpkin bread mix, a kit (from Hobby Lobby) to make a "BOO" garland, Halloween napkins, and a small amount of candy - I figured the pumpkin bread, BOO garland, and stickers were something that the families could enjoy doing together.

It's not too late to start this tradition in your neighborhood!  I've included a printable of the "BOO" poem (that provides the instructions for the recipient) below, as well as a printable of the "BOO" ghost sign that we used (although feel free to make your own - or let your kids design one!)

For the "BOO" poem - print on white or colored letter-size paper:

Click here to download BOO poem


For the "BOO" ghost sign - print on white letter-size paper and then use scissors to cut a ghost shape out of the paper.


Click here to download BOO ghost

Monday, September 14, 2015

Baby 101: Toddler Tableware

For the first several months of finger foods, we just dumped bite-size foods on C's high chair tray and let him go to town.  Once he was over a year old, I realized we should probably start teaching him to eat like an actual human and not a barbarian - you know, off a plate and with utensils :)  This is still a work in progress; he holds the utensils but doesn't know yet how to stab/scoop up food with them, although he can feed himself if we help him get the food onto the fork or spoon.  These are our favorite toddler tableware items:


Playtex Anytime Straw Cups

These are what we use for C's water and milk with meals; we prefer the straw cup to the typical sippy cup for oral development reasons - plus, it makes for an easy transition to kid's meal cups when we're eating at a restaurant.  We use the 9-ounce size without handles, although we started on the 6-ounce size with handles while he was learning to drink from a straw.

Munchkin Plates

We initially started with the Nuby sectioned plates, but they only come with 2 in a package (so they end up being more expensive per plate) and they do not "nest", so they take up too much room in the cabinet and aren't steady when stacked (they tend to avalanche).  We needed more plates so we ended up switching to the Munchkin brand plastic plates; they're less expensive and stack well in the cabinet. According to the box they're microwave and dishwasher-safe, although we try not to microwave any of C's food in plastic (even though they're BPA-free).


Gerber Graduates Kiddy Cutlery Forks and Spoons

I really like these forks and spoons; they have a thick rubber handle, making them easy to grip for C's little hands, and the actual eating surface is stainless steel, which holds up better than plastic to teething, seems easier to get really clean, and has a little more weight to it than some of the flimsy plastic cutlery they make for toddlers.  It also has a little foot built in that keeps the fork/spoon from resting directly on the table surface, so it stays cleaner while eating.  We just bought the forks and spoons in 3-packs (6 of each); they make a 3-piece set that contains a fork, knife, and spoon, but I can't imagine what scenario my toddler needs a knife for.

Gerber Graduates Bunch-a-Bowls

These little plastic bowls are the perfect size for C's oatmeal, yogurt, or applesauce - bigger than the small Pyrex cups we used when he was eating baby food, but still smaller than our regular cereal bowls.  I also love that they come with matching lids; if he doesn't finish something, we can just pop the lid on it and stick it in the fridge instead of having to transfer it to Tupperware.

Thursday, September 10, 2015

Baby 101: Toddler Finger Foods (and Food Label Reading)


Feeding C is so different now that he can pretty much eat most of what we eat.  It's easier, in that I don't have to make separate food for him, but also a pain to cut up everything into little tiny bites (not to mention messier with how much ends up on the floor!)  

For the most part, C can eat whatever we're eating.  However, we normally eat salad with dinner every night, so I normally end up making C a different vegetable since he can't eat salad.  If I'm using frozen vegetables (like I typically do for peas, broccoli, green beans, etc.), I'll usually just steam 1 or 2 portions (to have leftovers for the next day) at a time; for fresh vegetables (carrots, cauliflower, butternut squash, etc.), or frozen vegetables that are the steam-in-bag variety (so you have to make the entire bag at once), I'll make a huge batch at a time, cut them into bite-size pieces, and freeze them in 4-ounce portions in these silicone ice cube trays.  


Then, I can just reheat a cube at a time, similar to how I did with his homemade baby food purees.  This freeze-and-reheat method also works great for black beans (which I cook in a Crockpot using dried beans to avoid the salt content of canned beans) or leftover rotisserie chicken.

I'm always curious what my friends are feeding their 1-year-olds so I can get more ideas!  Here are some of C's staples since about 11 months.  I feed C mostly plain foods (without sauces, cheese, or casseroles) because I want him to taste the food itself and not cover it up by hiding veggies in a casserole or pasta dish.


  • Broccoli (steamed from frozen)
  • Green beans (steamed from frozen)
  • Peas (steamed from frozen)
  • Carrots (cooked from fresh, then frozen in 4-oz cubes)
  • Cauliflower (cooked from fresh, then frozen in 4-oz cubes)
  • Butternut squash (frozen steam-in-bag, then frozen in 4-oz cubes)
  • Sweet potatoes (baked and/or grilled until soft, then cut into bite sizes)
  • Avocado (fresh)
  • Grape or cherry tomatoes (fresh, cut into bite sizes)
  • Black beans (cooked in crockpot from dried, then frozen in 4-oz cubes)
  • Pineapple (thawed from Trader Joe's frozen pineapple tidbits - already perfect bite size!)
  • Berries (fresh, cut into bite sizes)
  • Peach (fresh, cut into bite sizes)
  • Mandarin oranges (fresh, cut into bite sizes)
  • Grapes (fresh, cut into bite sizes)
  • Bananas (fresh)
  • Watermelon (fresh, cut into bite sizes)
  • Cantaloupe (fresh, cut into bite sizes)
  • Unsweetened organic applesauce (I used to make this myself until I discovered it is actually cheaper to buy it and the ingredients are the same - apples and water)
  • Whole milk mozzarella cheese
  • Applegate Naturals deli ham (I used to use the turkey but now avoid it because it contains carrageenan - more on that below)
  • Grilled or rotisserie chicken
  • Hamburgers
  • Meatballs (from frozen)
  • Dr. Praeger's veggie burgers
  • Dr. Praeger's fish fillets
  • Grilled salmon (wild caught)
  • Whole wheat pasta (with or without sauce; I read labels to find spaghetti sauce that does not contain any sugar or high fructose corn syrup)
  • Whole wheat toast with peanut butter (I read labels to find peanut butter with no added sugar or oil - just peanuts and salt.  Our favorite brand is Laura Scudders)
  • Scrambled eggs
  • Homemade whole wheat oatmeal pancakes
  • Fage 2% plain Greek yogurt (I do not give him the fruit-flavored kind because of the sugar content; he'll eat it plain - since he doesn't know there is an alternative - or sometimes I'll add applesauce and/or cinnamon)
  • Organic whole milk

Reading labels


I try to avoid feeding C processed foods in general; for the exceptions, I always read the labels to make sure I recognize all of the ingredients (one reason I love Dr. Praeger's products) and there aren't any hidden sugars (peanut butter, applesauce, pasta sauce, yogurt, etc.)  

Via
Another ingredient I look for (and avoid) is carrageenan.  Carrageenan is a seaweed extract found in many food products for its gelling, thickening, and stabilizing properties; it is often found in dairy products and dairy replacements because it can mimic the full-fat mouthfeel.  Although its use is permitted by the FDA, many people experience gastrointestinal issues (gut irritation and IBS-like symptoms) resulting from ingesting carrageenan; since C is too young to tell me if his tummy hurts, I try to avoid carrageenan entirely.  It is hidden in lots of things I wouldn't have expected - almost all milk substitutes (almond milk, soy milk, coconut milk), infant formula, lunchmeat (even Applegate Naturals brand turkey has it), sour cream, and even toddler "training toothpaste".  


Another thing I check labels for is dairy pasteurization; C drinks organic whole milk with his meals and I make sure it is pasteurized but NOT ultra-pasteurized.  For some reason, organic milk sold by the gallon tends to be pasteurized, while organic milk in the half-gallon-size container tends to be ultra-pasteurized (the label will specify which pasteurization was used).   The downside of pasteurized (rather than ultra-pasteurized) milk is that it doesn't have as long of an expiration date (~21 days) as ultra-pasteurized milk (~70 days).  C drinks almost exactly 1 half-gallon per week (2 meals per day on weekdays and 3 meals per day on weekends), so a gallon lasts us 2 weeks.  Ultra-pasteurized milk is heated to a higher temperature, which kills more bacteria (including good bacteria/enzymes), allowing it to last longer before expiring.  Ultra-pasteurization kills virtually all of the enzymes and bacteria to the point that the milk cannot even be cultured to make yogurt or kefir. It is commonly referred to as "dead milk", and, from the research I've done, pretty much negates the point of buying organic milk in the first place.

Monday, August 24, 2015

Baby 101: Traveling with a Baby

We recently took our first flight with C (at 11 months old).  I stressed endlessly about packing everything we'd need to survive our first flight and out-of-town travel experience (other than the grandparents' house).  It turns out that it was good to be prepared - our 9:30 AM flight to Denver got cancelled due to weather in Dallas (thanks, Tropical Storm Bill), so not only did we have our first flight experience, we also got an extra 9 hours in DFW airport.  (By the time we got all that crap from the remote parking, through security, we were not going to turn around and go home for a few hours before our rebooked flight that evening).

Anyway, long story short, traveling with an 11-month-old took a lot of planning and multiple Amazon purchases!  Here's what worked well for us:

Booking Travel
Via
Booking Your Trip

If your child is over 2 years old, you have to buy them their own seat on the plane, so this won't apply; however, if your child is under 2 years old (bring a birth certificate to prove it, just in case!  I've heard Southwest asks 100% of the time), you have the option to travel with them as a "lap child".  (You can also buy them their own seat, but it's not required and it's at the full adult fare).  Make sure that, when you're booking your tickets, you book a lap child on your ticket if you're going that route.  Some airlines don't allow you to do this on their website so you'll have to call and add the baby to your reservation after (American is this way).  It is important for the baby to be noted on your ticket as a lap child because there can only be 1 lap child on each side of the aircraft due to the number of oxygen masks.  Double check at the airport that your boarding pass prints with "infant" or "lap child" or something similar written on it.

Overstuffed suitcase, ADHD packing tips
Via
Packing

Check your airline's website for their policies on traveling with infants.  Most airlines allows you a generous allowance for baby items, even if your child is flying as a lap child (i.e., doesn't have their own ticketed seat).  American Airlines allows you to bring a stroller, a car seat, and a diaper bag IN ADDITION to your normal carry-on allowance (you can either check these items for free at the ticket counter or carry them to the gate).  I printed the airline's policy on all of this in case anyone tried to give us any trouble, but no one even blinked.

You'll also want to plan ahead how you want to get all of this stuff on the plane.  One option is to check it at the ticket counter (since it's free); however, they manhandle that stuff and I didn't want our stroller or our carseat being damaged....ESPECIALLY the carseat, since 1) it may not work effectively in a crash if it's been damaged, even if the damage is not visible, and 2) if it gets damaged and/or lost in transit, you're stuck at the airport without a way to leave....so you'd have to wait there while someone made a Walmart run for a carseat.

Anyway, we decided to gate check our car seat and stroller, which just means that you take it up to the gate agent at the gate, they'll put a baggage tag on it (and give you a claim ticket), and you'll drop it off on the jet bridge when you board the plane.  They'll put it with the other checked bags (but there is less time / less distance for it to get manhandled) and it will be returned to the gate (not baggage claim) when you arrive at your destination.  If you do this, you'll want to protect the stroller and car seat from damage / dirt / rain -- see below for the bags we bought for this purpose.

I'd also recommend packing as light as possible.  We packed C's stuff in with our suitcases to minimize the number of bags we had to take.

When thinking how many people use air travel, is airport security tight enough?
Via
Navigating the Airport / Security

We ended up taking 2 carry-on rolling suitcases, a tote, a backpack, the carseat, and the stroller (so 6 total items).  The tote went on top of 1 rolling suitcase, the carseat was strapped to the other rolling suitcase, one of us wore the backpack, and the other carried the stroller (it had a shoulder carry strap).

For getting through security and around the airport, it was easiest to wear C in the Ergobaby carrier.  You do not have to take your child out of the carrier to go through security; they'll let you walk through the metal detector (not the body scanner thing) wearing the baby and then they'll swipe your hands (to test for explosives, presumably?).  Easy peasy.  It was easiest for me to go first, with C, so I could collect all of our stuff from the x-ray conveyor as Blair sent it through.

As for the baggage, everything except the carseat will go through the x-ray conveyor like normal (the car seat will not fit).  They'll take the carseat through the walk-through metal detector and then give it a visual inspection (so you do have to unstrap it from the rolling suitcase or take it out of whatever bag you might be carrying it in).  We re-hooked it to the rolling suitcase immediately after security to wheel it to our gate.  

Via
On the Plane

If your airline allows pre-boarding for families with small children, do it!  It is so much easier to board the plane without feeling rushed/stressed from the line of people behind you while you're trying to get situated.  We dropped the carseat and stroller on the jetbridge and I wore C in the Ergobaby carrier until we got to our seats.

Our flight was relatively short (~2 hours); during boarding and the drink service, C was entertained to watch the people walking down the aisle.  He also enjoyed playing with the magazines/brochures in the seatback pocket for a short time.  However, during the majority of the flight, there wasn't much to see (and he is not one to nap in our arms), so we had to keep him occupied.  He has never watched TV or the iPad, so we didn't want to bank on that working, so we went to the foolproof option: snacks.  Yes, C basically snacked the ENTIRE duration of the flight.  To keep our seats cleaner, and to make the snacks last longer, we handed him 1 piece at a time (otherwise, he grabs food by the handful and shoves it in his mouth, while dropping half of it).  I had packed his lunch in a small cooler (diced vegetables, deli turkey, mozzarella cheese, etc.), so we did that first....then resorted to Cheerios 1 at a time...and finally a pouch.  We've never given him pouch baby food before but it was convenient, it was mess-free, and it required him to suck/swallow, so that helped keep his ears from popping (I nursed during takeoff and landing, but this helped during the descent).

Here are the things that were must-haves for us for the trip (especially the flight):


1.  Travel carseat

Since we were going to be renting a car at our destination (Denver) and driving to Vail, we needed a carseat.  (Note: if you're still using an infant carseat, you can just bring that.  This is for a convertible carseat since C is too tall for the infant seat).

I had read enough horror stories online about trying to rent carseats through the rental car companies to know that we didn't want to go that route.  To summarize: even if you reserve one, they're not guaranteed to have them (or the right kind - e.g., infant, convertible, or booster) when you show up; they may be dirty; they may have damage that isn't visible (since you don't know the history); you won't have the manual or experience installing it; and the cost to rent ($5-10/day) adds up fast.  I also knew that we didn't want to bring our everyday carseats (Britax Boulevard ClickTights); although they are super easy to install, they are HEAVY AS ALL GET OUT (25+ pounds) and I did not want to lug those through the airport.  Plus, they were expensive, so if they got damaged by the baggage handlers, I didn't want to shell out $350 for a new one.

After doing some research, we ended up buying an Evenflo SureRide DLX, which was $99 at Babies R Us (so ~$80 after a 20% coupon).  It only weighs about 10 pounds, was easy to install, and is relatively compact so it fits in most vehicles (which was important since you never know exactly what rental vehicle they'll give you).  It fits rear-facing to 40 lbs and forward-facing to 65 lbs.  (A cheaper option is the Evenflo Tribute ($60 before coupon), but it only goes to 40 lbs rear and forward-facing, so it wouldn't last us as long and we'd end up having to buy another travel carseat in a couple years).  Anyway, the Evenflo Sureride ended up working out great and would be a great, budget-friendly option for a 2nd carseat for a spouse's or grandparent's car.

2.  Traveling Toddler Car Seat Accessory

The Traveling Toddler Car Seat Accessory is a a strap which hooks up to a carseat's latch connectors and allows you to strap the carseat to a normal carry-on size rolling suitcase.  We didn't try it, but they say that you can even strap your child into the carseat while you're wheeling it around the airport (it was definitely very secure on the suitcase).  We used this to wheel the carseat to security and around the airport, right until it was time to board the plane.

3.  Car Seat Gate Check Bag

This seems redundant of the strap, and, in theory, you could go without the strap mentioned above and use this bag the whole time.  I read a million reviews on Amazon and this one was supposed to be more durable than the J Childress brand (plus has a lifetime guarantee).  It has a shoulder strap, which is nice, although only if your carseat is as light as ours was (I can't imagine trying to carry our 25 lb Britax seat in this bag).  They make more expensive backpack-style carseat bags but this one worked fine for our purposes so I'm glad I didn't get the more expensive, brand-specific bag.  We put the carseat in this bag after we got to the gate (we kept it strapped to the suitcase the whole time we were walking around the airport because that meant it was one less bag to carry/keep track of).

4.  Umbrella Stroller

Unless you have a really good reason, I wouldn't bring a big or nice stroller, like a jogging stroller; most airlines will require you to check it at the ticket counter and can't guarantee that it won't get damaged in transit.  If you bring an umbrella stroller, you can take it to the gate and, if it's small enough, maybe even on the plane (we gate checked ours).  We have a Summer Infant DLite umbrella stroller which is lightweight, easy to use, and has a sun canopy.  I haven't tried out any other umbrella strollers, and a friend gave us this one, so I haven't really researched other options to know how this one compares.

5.  Stroller Gate Check Bag

Since umbrella strollers are kind of flimsy, you'll probably want it in a bag when you gate check it to keep it clean, dry, and less likely to get caught on something and broken.  This Angel Baby bag (same brand as the carseat bag) worked great; it doesn't have a shoulder strap, while the stroller itself does, so we carried the stroller through the airport (not in the bag) and put it in the bag when we got to our gate.

6.  Ergobaby Carrier

As mentioned above, it was super convenient to carry C in the Erbobaby carrier through security and throughout the airport, up until the point I sat down in my seat on the airplane.  Then, we just stuffed it in one of our carry-on bags.  (As a side note, we also hiked with C in the Ergobaby using the back carry and it worked out great! He snoozed the whole hike with the sleeping hood on to support his head from flopping).  I can't get over how comfortable it is to carry my heavy (20+lb) baby in this carrier; it really does support his body weight on my hips, rather than my shoulders/back, such that I carried him all around the airport AND several hours hiking without any discomfort.

7.  Sippy Cup

C's sippy cup was easy to fill up at water fountains in the airport or from the flight attendants on the plane and provided both hydration and an activity to occupy him :)  We like the Playtex Training Time Straw Cups.

8.  Small cooler + all of the snacks

Snacking was C's main entertainment on the flight.  Think about how many snacks you think you need, then double or triple it, just to be safe (remember the 9 hours we got stuck in the airport?!)  I used a small cooler (2-bottle size) and brought a few Tupperware containers with chopped up mozzarella cheese, turkey, and steamed vegetables, the ever-present Puffs and Cheerios, and several pouches of baby food (even if your kiddo is mostly past the baby food stage, these are great for travel since they are not messy and do not require refrigeration!)  If you're bottle-feeding, you'd want to bring bottles and breastmilk/formula, too.

9.  Antibacterial wipes

I found packages of antibacterial Wet Ones in the travel size section at Target, and they were great for wiping down hands, armrests, airplane tray tables, high chairs, etc.

10.  Stick-on disposable placemats

I do not leave the house without these Table Topper disposable placemats, and they were great on the trip as well! They stick securely to a tabletop with 4 peel-off adhesive strips, making it easy for a little one to eat a meal in a restaurant (without having a plate to fling across the floor).  I like to wrap the bottom edge of mine under the table so C can't put his hands all over the grimy underside of the table.

11.  Pocket bib

These Baby Hiccups pocket bibs are a lifesaver; we use them for every single meal at home, and it was great having one on the trip as well! The pocket on these catches pretty much every bite that falls out of C's mouth, saving us from having to pick up food from the plane/restaurant floor.  I also love that the material is easily wipe-able with a baby wipe for easy cleanup while traveling.

12.  Nursing cover

Nursing during takeoff and landing, like everyone suggests, seemed to prevent C from having any ear pain from the change in pressure.  I love the 360-degree-coverage of the Covered Goods nursing covers for discreet nursing in public, whether on a plane, in a mall, at a restaurant. etc.

13.  Changing pad, diapers, wipes

I love this JJ Cole travel changing pad with a pocket for a wipes case and diapers.  Bring way, way more diapers and wipes than you think you'll need - you never know when your flight will get delayed and all of a sudden you're spending 9 hours in DFW airport (not that I know from experience....)  If there is ever a time NOT to be caught short on diapers or wipes, it is while traveling!  You can buy more when you arrive at your destination for the remainder of the trip, but do not skimp for the travel days!  

14. Toys/Entertainment

Bring a few small toys/books for entertainment.  I didn't find that these entertained C for very long, so I'm glad I didn't use much room for packing toys and books.  He was more entertained by snacking, people-watching, looking out the plane window, playing with the magazines in the seatback pocket, and more snacking.  Some people bring an iPad with games/shows/movies loaded on it, but we chose not to; C doesn't watch TV or movies at home, so it's not something he's used to and it doesn't hold his attention span.

15.  Pacifier with clip

A pacifier helps with ear pressure (and keeps your plane neighbors happy), and a clip is a must to keep it from getting lost or dropped on the gross airport/plane floor. 

--------------------------------------------------------------------------------------------------------------------

More than anything, tell yourself that you'll never see any of these people again :)
09 10