Thursday, February 26, 2015

Friday Favorites

I'm linking up with MomfessionalsGrace and Love, and A Little Bit of Everything to share my Friday favorites!


1.  Snow Ice Days


All it takes in North Texas is a little freezing rain/sleet and you've got yourself 2 days off work!  I was beginning to think this winter was going to pass us by without a hard freeze and a snow day, but late February for the win!  I loved hanging out at home all day Monday and Tuesday with my favorite 7-month-old and my husband, who would normally be spending 16 hours a day at the office.  PJs all day, plenty of coffee, snuggles in bed....the best.  I will admit that not leaving the house started to drive me a little crazy after 48 hours!  We tried to make a baby snow angel but that sleet was frozen solid!  It was pretty to look at but crunchy sleet pellets are not nearly as much fun as snow!

2.  Adorable Boys' SunglassesBoys' Rectangle Sunglasses

I found these adorable wood-look wayfarers in the baby boy section at Target the other day for only $6 and was so excited for C to wear them this summer!  They were the only pair on the rack, which probably should have tipped me off that they were in the wrong spot....they are definitely from the older boys' department and are WAY too big for him (as in...they fit on my face).  Oh well, guess I'll hold on to them for a few years....

3.  Essie 'Cute as a Button'


Now that I've had my snow days, I'm officially ready for warmer weather and springtime.  I picked up this new shade the other day and love the color - the perfect coral, which I've had a hard time finding in the past (it's always too orange or too pink!)  This one is perfect!

4.  Oxiclean Spray


Are you using this stuff yet?  A fellow mom tipped me off to this Oxiclean spray when C was born, and I'm not sure how we ever lived without it.  (Sound cooler, why don't I?)  This stuff works like MAGIC, way better than the Shout I had used for years before.  I just bought the ginormous refill bottle because I've already used up an entire bottle of this stuff.  I keep one in the laundry room and one in C's room because, let's face it, his stuff is the problem!


Wednesday, February 25, 2015

Buy This, Not That: Jumperoos


At 6 months old, C is finally old enough to really enjoy his jumperoo!  I love the jumperoo since it keeps him upright and lets him look around (since he's not sitting on his own quite yet).  It's also nice for him to be able to entertain himself and stay in one spot while I wash dishes, cook dinner, etc.


We registered for this doorway jumper and received it as a baby shower gift; I love it in theory - a jumper that I can easily move around the house to the nearest doorway, and likewise can be put away easily when not in use.  However, in reality, it isn't my favorite - it doesn't "bounce" very easily, and since there are no toys or other entertainment, C gets bored in it quickly - I'll look over and he's just sitting there still, staring at me (or crying to get out).


Our pediatrician recommended getting a jumper of some kind to strengthen C's legs and keep him off his head (since right now tummy time is our only other option, and that doesn't work forever...).  After our lackluster enthusiasm about the doorway jumper, I scoured my local Facebook online garage sale site and bought a Fisher Price Jumperoo.  It is SO much better than the doorway jumper - it bounces easily, and there are several toys that C can play with if he doesn't feel like jumping.  He will happily play in this for 30-45 minutes at a time.

Monday, February 23, 2015

Baby 101: Homemade Baby Food

Before I even got pregnant, I decided that I wanted to make my own baby food.  There are so many benefits - one, it allows me to know exactly what's going into C's baby food.  I buy mostly organic fruits and vegetables for baby food.  Making it myself guarantees that It's all fresh - no preservatives, additives, or fillers.  Two, the baby food looks and tastes more like the "real thing".  Have you ever looked at the color of jarred peas?  They are a gross army green, not bright green like fresh peas.  Since homemade baby food is just pureed fruits or vegetables, it tastes exactly like what it is, just with a different texture.  Allegedly this helps babies adjust to table food better, since the taste is more familiar to them.  Three, the cost savings.  Even using organic fruits and vegetables, I can make baby food for a fraction of the cost of store-bought baby food, and MUCH less than store-bought organic baby food would be.
I've only made a few types of baby food so far, but here are my tips:
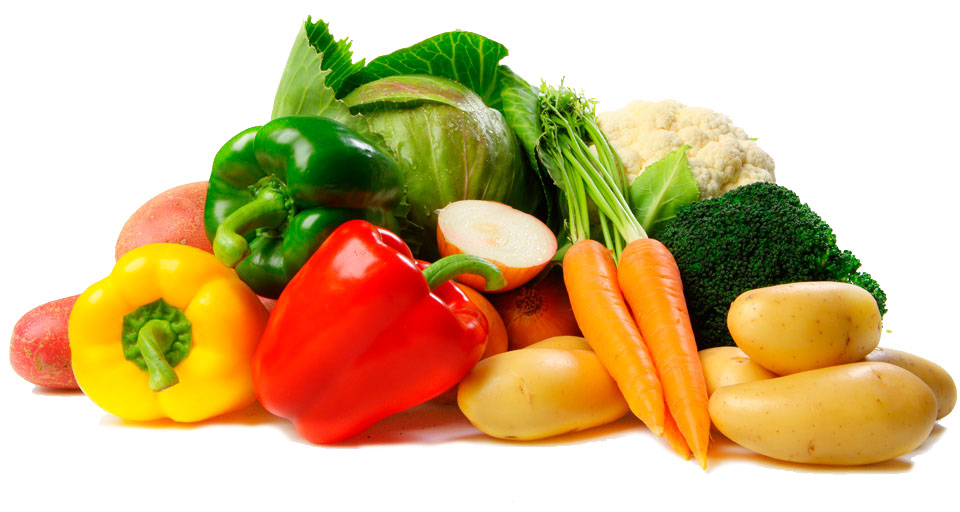
1.  Buy Organic When You Can

I try to buy organic fruits and vegetables for anything that's not on the "Clean Fifteen", and I DEFINITELY buy organic for anything on the "Dirty Dozen".  Babies are so much smaller, so pesticides impact them so much more.  I tried shopping for organic produce at my local Kroger and found the selection to be terrible, the quality poor, and the prices high.  I had much better luck at Central Market, and the prices were lower there too (which I didn't expect).
2.  Consider Frozen
Via
Unless it's in season, it's probably less expensive and better quality to purchase frozen fruits and vegetables.  Because frozen fruits and vegetables are harvested at their peak freshness, the quality is better than out-of-season fresh vegetables that have traveled halfway around the world to sit on the grocery store shelf for several days.  Central Market had a great selection of organic fruits and vegetables - I bought mango, peas, carrots, and broccoli.  They were sold out of organic green beans, peaches, and butternut squash, so I'll have to go back to get those.  The prices were pretty good, too -- most of the organic frozen fruits and vegetables were around $2 for a 16-ounce package, which made about 18-20 1-ounce portions after pureeing (due to the added liquid to puree).  Plus, frozen fruits and vegetables are SO easy to cook, since the prep work has all been done for you - no peeling or chopping required!  You can skip ahead straight to the cooking!  Check the ingredient label, though, to ensure the veggies don't have added salt and the fruit isn't in sugary syrup.
3.  Steam or Bake
Via
Microwaving or boiling vegetables seems easier, but steaming or baking them helps retain more of the nutrients (which is a major reason I'm making my own baby food anyway).  So far, I've steamed everything except for sweet potatoes, which I baked.  I'll admit - we got a steamer basket as a wedding gift over 5 years ago, and I'd never used it (I don't like steamed vegetables myself -- the mushy texture is off-putting).  I actually wasn't sure how to use it, but it turns out it's super easy -- just fill a saucepan with a tiny amount of water and bring it to a simmer/boil.  Set the steamer basket into the pan, fill with veggies, and cover with a lid.  I just kept an eye on mine until they looked/felt "done" - I think it was about 10-15 minutes, using frozen vegetables (should be faster with fresh vegetables). 
4.  Use Everyday Kitchen Tools
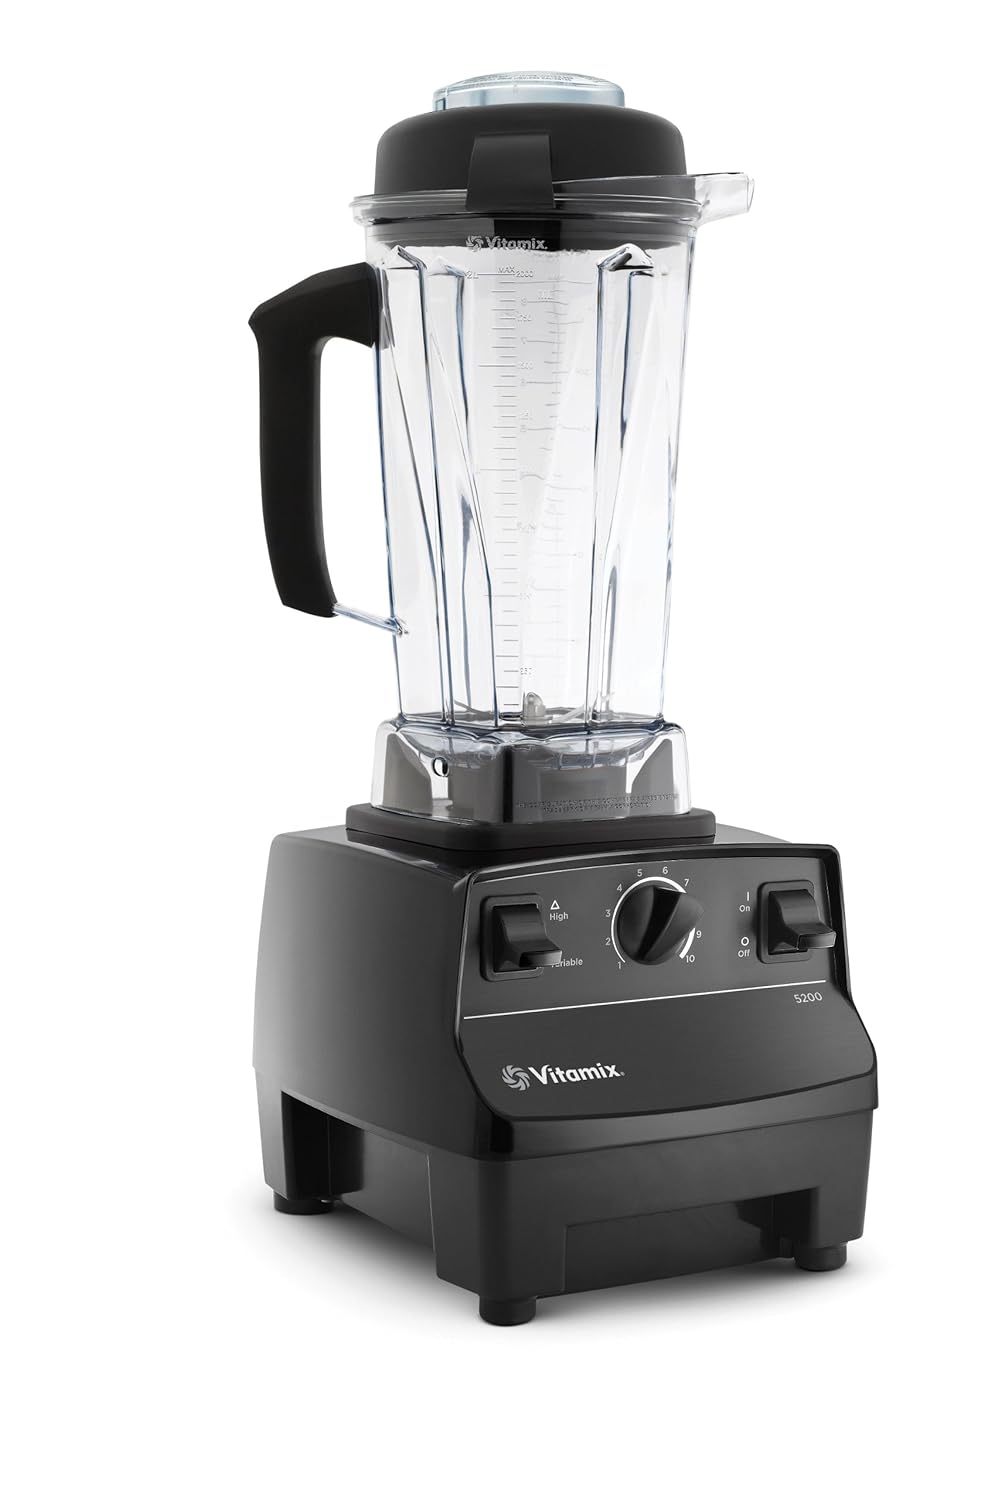
They make baby food-specific appliances that steam and puree all in one, but I'm not a big fan of baby-specific, cost-intensive equipment that will have limited use after I'm beyond the baby phase.  Instead, I use normal kitchen items.  To steam, you probably already have a saucepan and lid, and if you don't have a steamer basket, they're cheap.  To puree, you can use a food processor, blender, or Magic Bullet.  Last year Blair bought me a Vitamix blender for Christmas, and it is PERFECT for making baby food!  Yes, they're pricey, but if I added up all the money I've spent replacing burnt-out blenders over the years, it's probably equivalent to the cost of one Vitamix.  This thing is amazing - it is SO powerful, so it purees fruits and veggies quickly, without me constantly having to stop and scrape down the sides. 
Because it's so powerful, I don't need to add as much liquid to get the puree to the right consistency.  After steaming or baking the veggies, I dump the (hot) veggies straight into the blender and puree to see what texture they'll be without any added liquid.  I normally have to add a little liquid to get the puree smooth enough, so I add a tiny bit of the steaming liquid from the bottom of the saucepan that I steamed the veggies in.  This is beneficial because it "adds back" any of the nutrients that were steamed out during the cooking process.  It only takes a few tablespoons of liquid for a 16-ounce portion of veggies.  You can also use formula or breastmilk; we don't use formula, and I didn't use breastmilk in this application since I was making it in bulk to freeze for later, since you can't microwave breastmilk to thaw or heat the food later.  If I was making baby food to use immediately, I would use breastmilk in lieu of water.
5.  Prepare in Bulk
By the time you get all the equipment out - the saucepan and lid, steamer basket, and blender - you might as well prepare a bunch of baby food at once.  I changed the steaming water and gave the steamer basket and blender a thorough rinse (but not a complete wash) between vegetables and kept plugging away.  On 2 separate occasions, I made 5 fruits and vegetables and it took me between an hour and an hour and a half each time, although not all of that time was active cooking time (I ate dinner, washed bottles, etc. during that time while waiting on veggies to finish steaming).  This resulted in over 100 1-ounce portions of baby food in the freezer, which I'm hoping will last about a month.
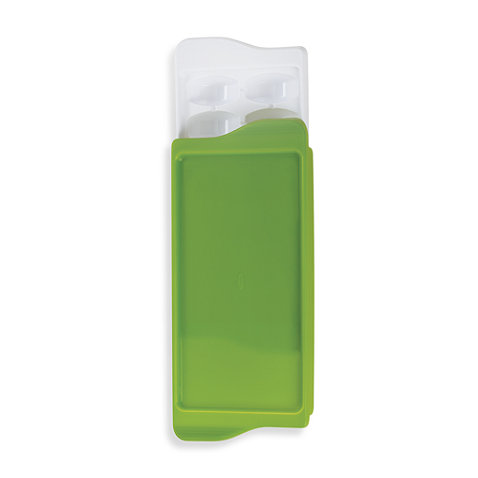
6.  Freeze in Portions
I used the OXO Tot baby food "ice cube" trays to portion and freeze the baby food in 1-ounce portions.  I poured the puree out of the blender across the ice cube depressions and used a small rubber spatula (these tiny ones are the perfect size) to fill the "cubes" and remove the excess.  There are 14 "cubes" per tray, and each 16-ounce bag of frozen vegetables filled about 18-20 cubes (so 1.5 trays).  Since I only have 2 trays, I froze one batch and put the rest of the purees in Tupperware containers in the fridge to freeze in batches over the next several days.  The ice cube trays aren't airtight, so I wouldn't use them for long-term storage (since they'll get freezer burn).  After the puree is frozen, remove them from the ice cube tray and store in gallon-size Ziploc bags in the freezer.
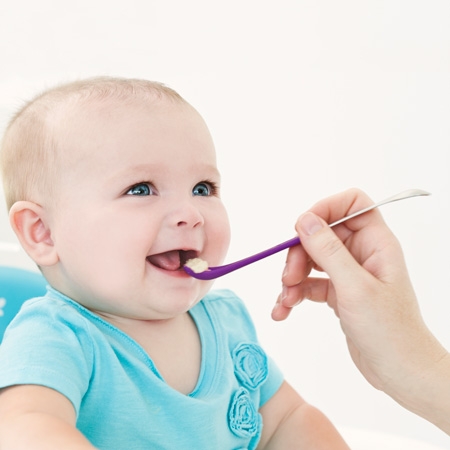
Right now, a 1-ounce serving is the perfect amount for C.  As he gets older, we can thaw 2 cubes for a 2-ounce portion, or even thaw 1 cube of 2 different fruits/veggies and mix them (note: when first introducing solids, it is recommended to serve only single-fruit or vegetable foods until you determine that baby doesn't have food allergies).

Wednesday, February 18, 2015

From the Kitchen: Crockpot Korean Pork Tacos

This fall/winter we've been using our Crockpot non-stop, especially on the days that I work and want to come home and play with my baby boy instead of cook dinner!  However, we get a little tired of the same old chicken dishes that seem to be Crockpot standbys.  This Korean pork recipe was delicious and different - it's definitely going into our rotation!


Crockpot Korean Pork Tacos

Adapted from Table for Two
Cook time: 8 hours


Ingredients:

1.5-2 lbs pork (I don't really think it matters what you use here - pork loin, pork tenderloin, boneless pork chops.  I used 2 boneless pork chops that were about 1.5 lbs.)
1 cups hoisin sauce (you can find this on the "international" aisle in your regular grocery store with the Asian ingredients)
3 cloves garlic, minced
3 teaspoons ground ginger
1 16-oz package broccoli slaw mix (in the refrigerated produce section, usually near the bagged salad)
3 Tablespoons rice wine vinegar
2 Tablespoons brown sugar
1 package flour tortillas
3 green onions, sliced thin


Directions:

Place your pork in the Crockpot (cut it into pieces if necessary to fit).  Add the hoisin sauce, garlic, and ginger, and thoroughly coat the pork with the sauce mixture.  Cover and cook on low for 8-9 hours.  When it's done, you should be able to easily shred the meat with 2 forks, like you would with pulled pork.  Mix the shredded meat with the sauce in the Crockpot.

Toss the broccoli slaw mix with the rice wine vinegar and brown sugar.  Serve the pork in tortillas along with the dressed slaw, and garnish with green onions.

Monday, February 16, 2015

Home Improvement: Painting Baseboards over Carpet

When we decided to convert one of our extra guest bedrooms into a playroom for C (and his millionty baby toys), one of my first missions was to paint the wainscotting white.  When we bought this house 3 years ago, we painted the wainscotting the same color as the wall above it, even though we would have preferred it white -- but the (white) baseboards were quite yellowed due to the age of the oil-based paint, and we had no idea how to paint baseboards that were installed directly over carpet (nor the patience to research how to do it).  So, we left the white/yellowed baseboards and just painted the wainscotting gray.

I'd always regretted that paint decision, and once we got rid of the set of bedroom furniture that was in the room, it seemed like the perfect time to bite the bullet and paint the wainscotting and baseboards with a fresh coat of ultra-white oil-based paint.  Just had to solve that one dilemma - how to paint the baseboards without dripping paint all over our new(ish) carpet.  

When painting walls, I use tons of painters tape and have no problem, but I knew that painter's tape wouldn't be a tight enough seal to keep paint from leaking into carpet fibers.  A little Google research and YouTube watching later, I had a plan....which I executed while my husband was out of town so that he couldn't get anxious about me screwing it up and getting paint on the carpet.  Ha!


What you need:

A metal putty knife
A 2mm plastic drop-cloth
Frog Tape
Scissors


How you do it:

First, you'll need the drop cloth.  


While it's an option to drop cloth the entire room, I didn't want to do that since it's a fairly large room and it would have taken several drop cloths.  Instead, I used a drop cloth only around the perimeter of the room to catch any drips/spray from the paint (I used a combination of a smooth foam roller and a brush to paint the wainscotting).  I used a 9' x12' 2mm plastic dropcloth.  Don't cheap out here and get the 0.7 mm, which will get rips in it if you so much as breathe on it.  Spring the extra $0.50 on the 2 mm drop cloth which is considerably thicker and harder to rip holes in, therefore providing better protection of your carpet.  I cut my drop cloth into 4 strips that were each 2'(ish) x 12' (cut it while it is still folded up in order to cut straight lines...if you unfold the whole thing and try to cut it, good luck!)

After I had my drop cloth "strips", I laid it out parallel to the baseboards and used the putty knife to wedge about 1/2" of the plastic underneath the baseboard.  To do this, I placed the putty knife about 1/2" from the edge of the plastic closest to the baseboard, angled the putty knife about 45 degrees, and pressed firmly until the plastic "caught" under the baseboard.  


If you do it right, the plastic should be firmly stuck under the baseboard, protecting the carpet.  Move over 3-4 inches and repeat, making sure that the plastic is taught between the 2 places you tucked under the baseboard.  If any plastic is loose, go back and tuck it under with the putty knife.  


Continue working your way along the wall, until you run out of wall or drop cloth.  Add a new drop cloth strip, using the Frog Tape to tape the new piece to the prior piece (same with corners).  I also used Frog Tape to tape the opposite edge of the drop cloth (the side furthest from the wall) to the carpet so that it would lay flat and taut while I painted and not get bunched up.


After you complete the entire room, you're ready to paint!  I used an oil-based white paint and a brush to do the baseboards themselves, trying not to get too much excess paint on the drop cloth, but I certainly had a lot of drips.  The next day, after the paint was dry to the touch, I just tugged on the drop cloth to pull it out from under the baseboards.  There was not a single drop of paint on my carpet!  Success!

Wednesday, February 11, 2015

Buy This, Not That: Crib Mattress Pads


Good: Waterproof quilted fitted mattress pad

I registered for and received 2 Carter's Keep Me Dry quilted fitted mattress pads.  They're pretty much tiny versions of the mattress pad you'd use on your own bed.

Better: Nothing

We used the crib mattress pads for the first few weeks, and then realized that it was a huge pain to change both the mattress pad and the crib sheet whenever C spit up or had a blowout in the crib.  Since our crib mattress has a plastic outside, it's waterproof in and of itself...so the waterproof mattress pad is not necessary like it is with normal adult mattresses. Cribs are supposed to be rock-hard anyway for SIDS purposes, so it's not like this was providing much padding.  We stopped using the mattress pads about 2 weeks in and haven't looked back.  I wish someone had told us how unnecessary these are!!

Monday, February 9, 2015

Baby 101: Must-Haves for Solids (Stage 1)


Once we'd finally figured out all the tools, tips, and tricks to breastfeeding, bottle feeding, pumping, etc.....it was time to start solids.  This introduced an entirely new set of equipment.  Here's what we're using for stage 1 solids (purees), to make, store, and serve:


1. A good blender or food processor

You don't need a special baby-food-making appliance to make purees; a normal blender or food processor will work just fine.  It will, however, be easier and faster if you have a high quality blender or food processor.  I have a Vitamix and it works great!


2. Steaming basket (and pot)

An inexpensive steaming basket is all you'll need to prepare fresh or frozen fruits or veggies to be pureed.  Put it in a pot over a tiny amount of simmering water, add the fruit/veggies, and cover....cook until soft!


3. Covered ice cube tray

These OXO Tot trays allow you to divide the purees into 1-ounce portions to freeze and use in the future.  The fact that they're covered (although not airtight) makes sure nothing icky falls on top of the baby food!


4. Mini rubber spatula

A tiny rubber spatula is helpful to smooth the puree into the ice cube "holes" and remove any excess (don't want to waste any of that hard work!)


5. Storage containers with lids

When we send solids to daycare, we use these OXO Tot baby blocks.  Go ahead and get the 4-ounce size right off the bat; your little one will eat more than 2 ounces before long and you'll have to upgrade to the 4-ounce size anyway, so why bother getting the small ones at all.  For cereal, I pre-measure the dry oatmeal cereal into these containers, and they simply mix with water at daycare.  For fruit/veggies, I'll pop a frozen veggie/fruit ice cube in the container the night before and leave it in the fridge to thaw.  At daycare, they'll warm it in the bottle warmer before serving.


6. Small Pyrex glass bowls

When we're at home, we use small Pyrex glass prep bowls to serve C's cereal and fruit/veggies...I don't like to bother washing the OXO Tot containers with lids when we're at home, so we only use those for daycare.  I like that these are made of glass so we can microwave the food to warm it (since we don't microwave food in plastic containers).


7. Rubber-tipped baby spoons

We love these Gerber Graduates rubber-tipped soft-bite spoons.  For reasons unknown, C chews the spoon with every. single. bite, so I'm sure a hard plastic or metal spoon would be painful on his little gums.  These are soft and don't seem to bother him when he chews on them.


8. Vinyl bibs

While cotton bibs are great for bottles and drool, they'll get stained and caked quickly with solids!  We like these JJ Cole bibs - they're waterproof, so nothing soaks through them, and they wipe off easily.  If he makes a huge mess, I throw them in the washer; the care instructions say not to machine wash them, but I do anyway.  I don't dry them, though - I just put them on our drying rack to dry flat.

Thursday, February 5, 2015

Friday Favorites

I'm linking up with MomfessionalsGrace and Love, and A Little Bit of Everything to share my Friday favorites!


1.  Chick-fil-A Iced Coffee


Chick-fil-A's new iced coffee is delicious!  It comes in both Original and Vanilla.  For the WHOLE month of February, you can get a medium iced coffee or a small hot coffee free (no purchase required).  I may or may not have driven through Chick-fil-A twice this week already for an iced coffee....


2.  Wild Basil + Lime Soap


I picked up a bottle of the Wild Basil + Lime Soap at Target last week and love the scent!  I'm a big fan of Mrs. Meyers hand soaps, but at only $2.49, this option is less expensive (although the fragrance is not as strong)!  I think the bottle is prettier than your average plastic-soap-bottle, too.

3.  Trader Joe's S'mashing S'mores

Via

I got these in my Christmas stocking and just got around to opening them.  OMG.  So good.  They're perfect if you pop them in the microwave for about 5 seconds to get them a little melty.  Yummmm.

4.  NYC Rivington Rose Lip Gloss

New York Color Liquid Lipshine Lip Gloss in Rivington Rose 4
Via
Somewhere (a blog? a magazine?) I saw a review of this NYC Liquid Lipshine in Rivington Rose; for only a couple of bucks, I impulse-bought it at CVS.  I love it!  I'm not a lip gloss snob (I lose them way too often to buy $20 lip glosses), but this one has a great color and lasts well without feeling sticky.  It is pretty highly pigmented - it's not a sheer gloss - but I'm not a lipstick wearer so that's perfect for me.

Wednesday, February 4, 2015

Buy This, Not That: Breastmilk Freezer Storage Bags


July 2017 update: this post has been viewed over 35,000 times.  Target recently changed their Up & Up breastmilk storage bags - they now come in a box with blue/green text, not yellow as shown in the graphic below.  Although I have not yet bought any of the new bags (I'm still working through a stash of the yellow box variety!), they do NOT have good reviews - users are commenting that they leak (liquid gold!!!) frequently.  In the meantime, I'd suggest sticking with the Lansinoh bags.

If you're breastfeeding and going back to work...or ever want to spend more than 2 hours at a time away from your child...you'll probably find yourself pumping. It's nice to have a stockpile of breastmilk frozen in the freezer so you can have a night out once in a while!  Since I'm back at work now, I use breastmilk freezer bags constantly to freeze surplus pumped milk, since I tend to pump more ounces than C drinks in a day.  I've tried several brands...there IS a difference!

Bonus Tip: Did you know that breastmilk storage bags are FSA-eligible?  (I just found this out!)  You can adjust your FSA contribution after your baby's born, since it's a qualifying "life event" - so set aside some money for your breastmilk storage bags so you can buy them with tax-free money.  Every little bit of savings helps, especially when it comes to everyday consumables!  


Medela makes the most popular breast pumps, so all Medela accessories must be preferable too, right?  Wrong.  I automatically started with the Medela bags, assuming they'd be the best option to use with my Medela pump.  They are awful; after I used up the first box, I never bought them again.  They do NOT freeze flat, which means they take up an unnecessary amount of room in the freezer.  If you regularly pump and freeze milk, freezer space is at a premium!  I do not have the freezer space or patience to deal with these lopsided freezer bags!  The also only have 1 zipper to seal them, which made me nervous; most other brands have dual zippers.


These are better in every way than the Medela bags; they freeze totally flat, so you can store them compactly like file folders in a box or gallon-size Ziploc bag.  They have 2 zippers, so they're less likely to leak.  These storage bags are actually probably my real favorite, except for the fact that they are more expensive than the 3rd option below.


These are very similar to the Lansinoh bags; they freeze flat and have 2 zippers.  The plastic is slightly thicker than the Lansinoh brand, too.  However, being Target brand, they're cheaper (I think they're normally about $13 for a box of 100, as compared to $17-18 for the Lansinoh ones).  

Monday, February 2, 2015

Baby 101: Starting Solids

Disclaimer: I am not a health or medical professional; this is strictly based on my own research, experience, and mommy intuition. :)
The first several months of feeding a baby are straightforward: breastmilk or formula, and that's it.  The only questions are how much and how often, which your baby is usually pretty good about communicating (ha!)  I found introducing solids to be slightly overwhelming, in no small part due to the vast amounts of conflicting research that's out there.  No matter your position on solid foods, there is a study that both supports and contradicts it, so you really have to go with your pediatrician's advice and your gut.

Via

When?

There is a ton of conflicting information about when to start solids; most health professionals agree that 4 months is the absolute earliest you should start any kind of solids (unless directed by a pediatrician earlier for a medical condition like reflux).  However, many sources will advise waiting until around or after 6 months before beginning solids, including the American Academy of Pediatrics and the La Leche League.  The rationale behind this theory is that prior to 6 months, babies have a "virgin" or "open" gut, which allows particles from anything they consume to pass directly into the bloodstream; this can (in theory) contribute to food allergies. 
Due to all the opinions out there, we decided to follow our pediatrician's advice; she instructed us to start solids NO EARLIER than 5 months but said that we could wait until after 6 months if we wanted.  We had planned to wait until 6 months, but slightly after 5 1/2 months, C was showing signs of being ready for solids, so we started about a week and a half before he turned 6 months old.  (To me, this is "around" 6 months, which is what the AAP and LLL recommend). Different babies are ready at different times, though, so there's no universal "right time".  If you try to start solids and your child can't figure out how to swallow (instead spitting it out), wait a while and try again; they may just not be ready yet.  C was instantly able to eat off a spoon and swallow the food, so I feel like our timing was about right for him.

What?

There is also a lot of confusing advice about WHAT to feed your baby first.  Conventionally, rice cereal has been a baby's first "solid".  Now, there are other options like oatmeal and barley cereal.  There are also a lot of people who discourage starting with baby cereal and instead recommend starting directly with fruits and vegetables, since baby cereals are essentially empty calories.  Again, due to all the conflicting information, we consulted our pediatrician.  Based on everything I had read, I was planning to skip the cereals and go straight to pureed vegetables.  

However, our pediatrician strongly encouraged feeding C cereal first, since he is exclusively breastfed; baby cereals are iron-fortified, and breastfed babies begin to have declining iron levels after 6 months old, since breastmilk doesn't contain a lot of iron.  (For the first 6 months, babies survive off the iron they got from your placenta in utero).  Formula is iron-fortified, so this is less of an issue for formula-fed babies.  She agreed that cereal is "empty calories" but said that it was necessary for the iron content, so we complied. 

I did choose to feed C organic, whole-grain baby cereal (instead of the standard Gerber product), and also decided to do oatmeal in lieu of rice cereal, due to the arsenic levels in rice.  We're using Earth's Best Organic Whole Grain Oatmeal, which you can buy at any grocery store.  It is recommended to start with single-grain cereals while you monitor for any food allergies.  We started with 1 tablespoon of dry oatmeal cereal mixed with breastmilk; we experimented with the consistency until we figured out where C was in terms of swallowing (we started with it very runny and gradually made it thicker as long as it appeared he could handle swallowing it).  We've been using the Gerber Graduates soft-tipped spoons, which are the perfect size and soft on baby's mouth (which is good because C likes to "chew" the spoon with each bite with his gums, which seems painful with a metal or hard plastic spoon).

Via
After the introduction of oatmeal, we gradually started introducing pureed vegetables.  Our pediatrician advised waiting 4 days between each new food introduced so you can monitor diapers and skin for food allergies.  4 days after introducing oatmeal, we gave C avocado, which I mashed well with a fork and mixed with a tiny bit of water to make it runnier.  I plan to introduce several vegetables before we try fruit so that he doesn't develop a preference for sweet foods (I'm not sure if this is scientific, but it seems logical to me).  Similar to the cereals, the first foods should be single-fruit or single-vegetable so you can monitor for food allergies; later, vegetables and fruits can be mixed together if desired.  So far, C has happily eaten everything we've fed him, but some babies appear to dislike certain fruits or vegetables, so their parents stop feeding it to them.  I've read that it can take 3-4 times for a baby to adjust to the taste of a fruit or vegetable, so don't give up if baby spits it out on the first try - it may just take a few more tries before they like it.

Baby-led weaning is a popular subject in the mommy world right now, and I don't have strong opinions about it.  If you're not familiar with it, in a nutshell, this approach involves feeding your baby very small pieces of soft, cooked food but NOT pureeing it.  We personally chose not to use this approach since C eats half of his solids at daycare, and we don't feel comfortable with the increased choking risk without one of us present.  It may have been a different decision if I were a stay-at-home-mom who was going to directly supervise every meal he ate, but that's neither here nor there.

How much?


Right now, at 6 months, C eats 1.5 tablespoons (dry measurement) of oatmeal, mixed with water or breastmilk, for "lunch" everyday, and 2 tablespoons (1 ounce) of pureed vegetables + 1 tablespoon (dry) of oatmeal cereal mixed with water or breastmilk for dinner.  He has his bottle (pumped breastmilk) or nurses first, though, to ensure that he doesn't get too full on solids to drink his milk; formula or breastmilk should continue to be baby's primary source of nutrition for the first year of life.  Contrary to logic, babies should not decrease their formula or breastmilk intake after they start solids; it should stay the same (25-35 ounces per day).  If your baby begins consuming less milk, you should cut back on the amount of solids or change the timing of when you serve them, since milk/formula is more nutritional.  (Hence the phrase, "food before one is just for fun.")  Some babies do well with a bottle/nursing immediately followed by solids, while some babies need to space it out (say, a bottle/nursing and then solids an hour later). 
09 10