Monday, November 24, 2014

From the Kitchen: Crockpot Chicken Tortilla Soup

Since I've gone back to work, the crockpot has gotten a lot of use.  I can't bring myself to spend time in the kitchen cooking dinner when I get home from work when I'd rather be playing with Carter!  This chicken tortilla soup is one of our staples. If you want a thicker soup (more like a stew), omit the chicken broth.  For a thinner soup, add a 32-ounce carton of chicken broth.


Crockpot Chicken Tortilla Soup

Ingredients:

2 boneless, skinless chicken breasts
1 - 15 oz can crushed tomatoes
1 - 10 oz can of red enchilada sauce
1 - 4 oz can chopped green chilies
1 - 10-oz can diced tomatoes w/ green chilies
1/2 white onion, diced
½ zucchini, sliced
½ yellow squash, sliced
1 cup frozen or canned corn
2 cloves garlic, minced
1 teaspoon cumin
1 teaspoon chili powder
1/2 teaspoon salt
1/2 teaspoon pepper
Handful fresh cilantro, chopped
Optional: 1 – 32-oz carton chicken broth

Optional toppings:
Cilantro
Shredded cheese
Tortilla strips
Diced avocado
Sour cream

Directions:

      Put all ingredients (other than the toppings) into a large crockpot (mine is 7 quarts). Cook for 6 to 8 hours on low or 3-to 4 on high.  Remove the chicken breasts from the crockpot and shred with 2 forks; return to crock pot.  Serve, adding toppings as desired.

     If you want to make this ahead of time as a freezer meal, put all of the ingredients except the chicken broth in a zip-top freezer bag.  When ready to make, slightly thaw the bag enough to break the soup into large chunks.  Place in the crockpot, add chicken broth, and follow the cooking directions above.

Thursday, November 20, 2014

Friday Favorites

I'm linking up with MomfessionalsGrace and Love, and A Little Bit of Everything to share my Friday favorites!


1.  My New 'Blardigan'


I've wanted one of these for months but couldn't justify the $90 price tag until my husband surprised me with it for my birthday last week!  Don't mind the Nordstrom model wearing it with lingerie - although you'll find it in the lingerie department, it can be worn as normal clothes or as loungewear (or both! in the same day!)  It is soooooo comfortable - true to its nickname, it's half blanket, half cardigan, and made of the softest material ever.  So warm.  So cozy.  I'm probably never going to take it off this winter.

2.  Crabtree & Evelyn Hand Cream


With the onset of freezing cold weather (since Dallas doesn't have a fall season), my hands are already dry - running the heat and washing bottles are a killer combo on my hands!  I love Crabtree & Evelyn's Hand Therapy Creams - they are the best moisturizer without feeling greasy. I love the avocado scent (which doesn't smell anything like avocados, but does smell delicious).

3. Peppermint White Chocolate Mochas

Peppermint Mocha

I had my first Starbucks peppermint white mocha of the winter season this week, and it was amazing!  Yes, I'm aware that you can order this drink year-round, but something feels wrong about drinking it before it's cold outside and served in a red Starbucks cup!  I like it best with nonfat milk and only 2 pumps of syrup in a grande size (it's too sweet for me full-strength).  I can't wait to try the new Chestnut Praline Latte this year!

4. Hue Wide Waistband Leggings


I love leggings and knee-high boots in the winter, and Hue leggings are the BEST!  After years of buying plain black leggings at Target or Old Navy, last year I bit the bullet and tried the Huge leggings.  Yes, they cost more than the $8 pair at Target (normal price $36, but currently on sale for $27 at Nordstrom!!), but they are much better quality.  I always feel like cheap leggings are see-through, but Hue leggings are completely opaque.  They wash well, and the wide waistband is both comfortable and flattering (no muffin top!)  I bought my second pair this season and they're both getting plenty of wear! In fact, Hue leggings and my blardigan are pretty much my new weekend wardrobe.

Buy This, Not That: Sound Machines


I wasn't sure on having a sound/white noise machine in the nursery, but our pediatrician recommended it, as well as the Moms on Call book, which I essentially consider my baby instruction manual.  I do think it helps C sleep; our pediatrician said using a white noise machine has something of a "Pavlov's dog" reaction where it actually helps them fall and stay asleep (and fall back asleep if they wake up during the night).  At the very least, it drowns out background household noise and keeps them from startling awake during daytime naps.


This plush sleep is pretty much the cutest sound machine on the market!  It has 4 different sound options (Mother's heartbeat, spring showers, ocean waves, whale songs) and can be set to run for 23 or 45 minutes.


This sound machine isn't nearly as cute as the Sleep Sheep, since it's not actually a baby product; it's just a normal sound machine.  However, it's better than the Sleep Sheep in several ways.  One, it can either run for an hour, or ALL NIGHT.  The key to a sound machine is that it has to run all night; otherwise, it doesn't help your baby fall back asleep on their own if they start to wake up during the night; secondly, sometimes the shutting-off of the sound machine can actually wake the baby up.  Secondly, this one has a true white noise setting, which the Sleep Sheep doesn't.  White noise is the ideal setting for drowning out other noises, because it is a constant background noise.  Heartbeats, rain, and ocean waves all have pauses between sounds, which decreases the sound machine's effectiveness at drowning out background noise.  Finally, the Conair sound machine has a power adapter, while the Sleep Sheep runs on batteries (the Conair has the ability to run on batteries too, which might be nice if you're traveling).  If you haven't learned yet, you will soon - avoid battery-operated baby products at all costs!  Those batteries always seem to run out at the worst times!!  And...for a bonus perk...the Conair sound machine is about half the price of the Sleep Sheep.


Tuesday, November 18, 2014

From the Kitchen: Kale Salad

Kale seems to be the "it" vegetable these days.  It has lots of great health benefits, but honestly I couldn't really get over the slightly bitter flavor and the "sturdy" texture...until I tried this salad recipe.  I took this salad over to a friend's house for dinner with another couple, and it changed all 4 of our opinions of kale (we were skeptics before)!  I think the key is massaging the dressing into the kale using your hands, and letting the salad sit, dressed, for at least 10 minutes before serving.  I actually dressed the salad before the 20 minute drive to their house, and it was perfect (whereas normal salad would be soggy by then!)


Pecorino Kale Salad

Adapted from Smitten Kitchen

Ingredients:

1 bunch kale, washed and dried
1/2 cup walnut pieces
1/2 cup dried cranberries
2 ounces pecorino cheese, grated
1/4 cup panko breadcrumbs
1 tablespoon white wine vinegar
Kosher salt
Fresh ground pepper
3 tablespoons olive oil
Juice of half a lemon


Directions:


Preheat your oven to 350 degrees.  Place the walnuts on a cookie sheet and toast in the oven for 10 minutes, tossing once halfway through.  Allow the nuts to cool and chop.

Mix the panko bread crumbs on a foil-lined cookie sheet with 2 teaspoons of olive oil and a pinch of kosher salt. Toast in the oven for 3-5 minutes or until golden.

In a mason jar, mix together the white wine vinegar, 2 tablespoons and 1 teaspoon olive oil, and juice of half a lemon.  Add kosher salt and fresh ground black pepper, and shake the jar to combine the ingredients.

Prepare the kale; use a knife to cut the leaves off of the tough stem, and discard the stems.  Stack the leaves, roll them up, and use a knife to cut them into very thin strips (like you would chiffonade herbs).

Put the kale into a large salad bowl.  Add the grated pecorino cheese, toasted walnuts, dried cranberries, and dressing, and use your hands to "massage" the dressing into the kale and ensure it is thoroughly coated.  Allow the salad to sit for at least 10 minutes before serving.

When ready to serve, add the breadcrumbs and give the salad a final toss.

Since kale is so sturdy, any leftovers will keep for at least a day, even after it is dressed!

Thursday, November 13, 2014

Friday Favorites

I missed Friday Favorites last week because I was busy spending my birthday sick with the worst. stomach. bug. ever (thanks, daycare germs).  I spent the entire weekend barely getting out of bed and didn't eat anything until Monday.  Not the best birthday...so I announced that last weekend did NOT count as my birthday (after all, what good is a birthday without cake or wine?!), and have declared this weekend "birthday do-over weekend".  Yay!

I'm linking up with MomfessionalsGrace and Love, and A Little Bit of Everything to share my Friday favorites!


1.  Free Stuff on Your Birthday


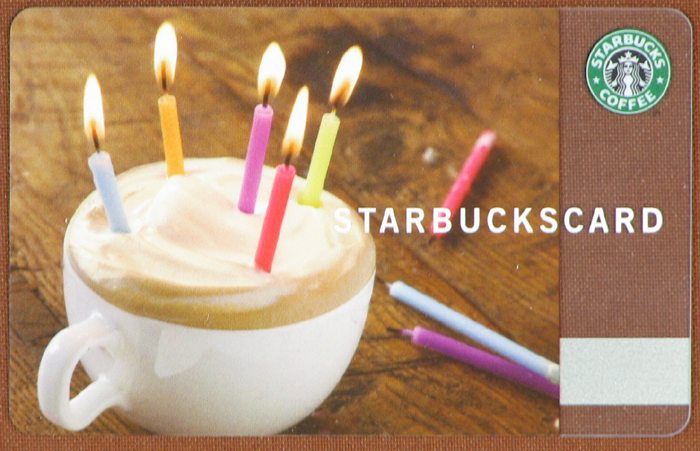
Anyone who knows me knows that I love free stuff anytime, but I ESPECIALLY love free stuff on my birthday.  I'm not one of those crazy people who drives all over town cashing in on birthday freebies at every place in town, but there are a couple that I always make sure to use (quality over quantity)!  One is my free Starbucks drink (for having a registered Starbucks gift card), and my other favorite is a free large pizza at Grimaldi's (for signing up on their email list) - cheap date night!  I know there are other birthday freebies out there -- am I missing anything good??

2.  Grimaldi's Butterscotch Toffee Cheesecake


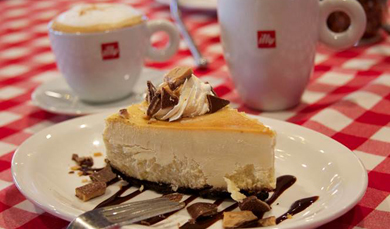
Speaking of Grimaldi's....I love their Butterscotch Toffee Cheesecake.  I don't normally order dessert when we go out to eat (unless it's a special occasion or something), but I always order a slice of this cheesecake  when it's in season (in the fall - so basically, when I'm there to get my free birthday pizza!)  It is SO good.  I always order it to go and then enjoy it over the next several days :)

3.  Flannel Pajamas


Now that it's finally cold in Dallas (we skipped fall entirely and went straight for winter), I'm loving my flannel pajamas at night!  My favorites are the Dreamer Flannel Pajamas from Victoria's Secret; I love the boyfriend-style button-up top and the soft, warm flannel.  They always come in such cute prints, and I love that they sell tall/long length pajamas online (PJs never come in sizes for tall girls!!)  These make a great Christmas gift if you've already started shopping!

4.  These earrings


I got these earrings from Nordstrom in the mail last week and have already worn them several times - I love the color, which is somewhere in between mint and turquoise.  They are virtually identical to my Kate Spade studs, except for the part where these only cost $8 instead of $38 like the Kate Spade ones.  Score!  Another good Christmas gift item to stock up on for the girls on your list!  

Baby 101: How to Pump in the Car

Total game changer: learning how to pump in the car.

Since I leave for work before C wakes up (now that I get to work at 7:00 AM), I have to pump in the mornings.  I'm sure I'm not the only one who despises having to wake up an extra 20 minutes early to have time to pump before work.  I'd read online about pumping in the car during the commute, but it seemed logistically difficult; however, the lure of an extra 20 minutes of sleep each morning eventually won me over, and I bit the bullet and bought a Medela power adapter for my car's cigarette lighter.  Now that I've been doing it for a couple of weeks, I love the extra sleep and the feeling that I'm multitasking on my 20-minute drive to work.  Here are some tips based on what's been working best for me:

1.  Leave an extra 5 minutes early.

Via
It takes me 2-3 minutes to get everything "set up" before I start driving, and another 2-3 minutes to unhook everything when I arrive to work.  So I try to leave the house about 5 minutes earlier than I normally do.

2.  Hook/unhook everything while your car is in Park (safety first!)

Via
Do not attempt to set up your pumping stuff or unhook it while you're driving, or even while you're at a red light.  I set everything up while I'm still parked in my garage, and wait until I'm parked in a parking spot at work before I unhook anything.  When I'm ready to stop pumping mid-commute (because it normally doesn't take me the whole time), I'll just unplug the tubing from the pump flanges and let the pump continue to run (and leave everything else - the pump flanges, pumping bra, etc. - where it is).  This has a side benefit of allowing the condensation in the tubing to dry out by the time you get to work and turn the pump off. 

3.  Buy a car power adapter for your pump

Via
Obviously, a power adapter for your pump is a necessary part of the pumping-while-driving equation.  I bought mine at Babies R Us for $29.99, less a 20% off coupon.  Make sure you check the voltage on your pump - Medela pumps come in both 9V and 12V, so you need to get the right power adapter for your specific pump model.

4.  A hands-free pumping bra is a must

Via
It's not possible to pump and drive at the same time (safely, at least) without a hands-free pumping bra.  I use the Simple Wishes pumping bra, which I bought off Amazon; it zips up easily over whatever I'm wearing, and is sturdy enough to hold 2 full 8-ounce bottles in place.

5.  A nursing cover is another must

Via 
Unless you're a pumping exhibitionist, you'll want a nursing cover to hide the whole pumping setup while you drive.  I've found it to work best if I put the nursing cover on AFTER I fasten my seat belt, so the nursing cover is on top of everything.

6.  Use large (8 or 9-ounce) bottles

Via
I normally pump into the 5-ounce Medela bottles; however, for pumping while driving, I recommend using 8 or 9 ounce bottles.  Since you're driving, plus wearing a nursing cover, it's more difficult to monitor how full the bottles are getting.  Using larger bottles means I don't have to worry about the bottles overflowing while I'm driving...especially since I'm normally pumping during my morning commute, when my output volume tends to be higher.

7.  Have a towel/napkins handy for drips

Via 
Whenever we go to a drive-through or get takeout and end up with a handful of restaurant paper napkins, I always just put them in the console between the driver and passenger seats.  It's nice to have them nearby to clean up any drips when I'm unhooking all the pump equipment.

8.  Get everything organized before you start

I put my purse and the bag I keep all my pump stuff in on the floor on the passenger side.  Then, in the passenger seat, I put my pump, a paper napkin, and the Tupperware container (with the lid off) that I keep my pump parts in.  I also make sure to clear out my car's cupholders. 
When I get to work, I unhook everything with the nursing cover still on; I unscrew the bottles from the pump flanges and put them directly into the 2 cupholders until I get a chance to put caps on them (if I try to hold the bottles upright between my legs, I'm sure I'll end up with milk spilled all over my car).  I put the pump flanges directly into the open Tupperware container and put the lid on.  I screw caps onto the bottles and put them in my cooler.  Then, after I take off the pumping bra and nursing cover, I go into work and walk straight to our "wellness" room, where I put my milk cooler and Tupperware of pump parts in the refrigerator.

Tuesday, November 11, 2014

Buy This, Not That: Swaddles


I do not want to know what happens after you have to stop swaddling your baby.  Swaddling is the only thing that keeps C asleep all night....the second he breaks out, he startles and hits himself in the face and wakes up crying.  Swaddling has been a lifesaver for us, and we've tried our fair share of swaddling-related products!


Don't get me wrong...I LOVE these Aden + Anais muslin swaddle blankets.  They are the perfect lightweight material, and I always have one in my diaper bag - they are perfect for laying on the ground when you're out in public and want to let the baby play, and they are great for providing a little extra warmth in the carseat or stroller.  However, I don't recommend them for actual swaddling purposes.  These require learning an actual swaddling method, which is extra effort in the middle of the night, especially since C ALWAYS broke out of these when he was swaddled in them.  I think it's because the muslin fabric has a little "give", which is not what you want to keep your baby swaddled tight!  In summary: still buy them, but not for swaddling.


Our hospital gave us one of these at our childbirth class, so that seemed like a pretty strong recommendation.  It's essentially a sleeveless sleepsack; stick your baby's arms through the arm holes, zip it up, and then use the two swaddle "flaps", which velcro, to swaddle baby's arms.  This one was great in theory, and it worked for about the first 2 weeks....and then C got too strong and broke out of this swaddle every. single. time.  The fabric is pretty stretchy, so he was able to loosen it up and get his arms out.  Not good!


These are the holy grail of swaddling products!  They're similar in concept to the Halo Sleepsack Swaddle, except there's no zipper or armholes involved.  Put your baby's legs in the pouch part, and then use the two swaddle "flaps" to velcro baby's arms securely by his side.  These wraps are made from cotton that only has a slight stretch to it; C had a much harder time breaking out of these.  We used the small size for the first month, then upgraded to the medium/large size, which we still use today at 3.5 months.   

Monday, November 10, 2014

From the Kitchen: DoubleTree Hotel Copycat Chocolate Chip Walnut Cookies

My sister swears up and down that these are the best chocolate chip cookies out there, so I had to make them!  I don't know that I've ever stayed at a DoubleTree hotel, but they're supposedly the same (or at least similar) to the cookies they serve to guests there.  Regardless, they are fabulous!  The ground oats and walnuts add a great texture to these cookies!


Ingredients:

1 cup (2 sticks) unsalted butter, room temperature
3/4 cup brown sugar, packed
3/4 cup granulated sugar
1 1/2 teaspoons vanilla extract
1/2 teaspoon lemon juice
2 eggs, room temperature
1/2 cup old-fashioned oats, ground to a fine texture in a food processor (I used a Magic Bullet)
2 1/4 cups all-purpose flour
1 1/2 teaspoons baking soda
1 teaspoon salt
1/4 teaspoon cinnamon
3 cups semi-sweet chocolate chips (I used 1 cup mini chocolate chips and 1 1/2 cups regular chocolate chips)
1 1/2 cups chopped walnuts


Directions:

Using an electric mixer, cream together the butter, brown sugar, granulated sugar, vanilla, and lemon juice.  Add the eggs and mix until smooth.  Add the dry ingredients into the wet ingredients and mix well.  Add the chocolate chips and walnuts and mix by hand until the ingredients are well blended.

Chill the dough in the refrigerator for 1-2 hours.  THIS IS CRITICAL TO THE TEXTURE OF THE COOKIES!!!!

Preheat your oven to 325 degrees.  Use a cookie scoop to spoon the cookie dough (approximately 1.5 tablespoon portions) onto a Silpat-lined cookie sheet.  Make sure to put the rest of the dough back in the refrigerator between batches!! Bake for approximately 8 minutes* (the cookies will still look slightly underbaked but will continue to bake on the cookie sheet). 


Remove from the oven and allow the cookies to cool for 2 minutes on the cookie sheet before placing on a wire baking rack.


*8 minutes was perfect in my oven, but all ovens are different; start checking around 7 minutes and continue to bake in 30-second increment until you reach the right level of doneness!


Tuesday, November 4, 2014

Buy This, Not That: Diaper Rash Cream


Diaper rash cream....I had no opinions on this one way or another until C got a diaper rash, and then it became the most important product in our arsenal!  Nothing makes you feel worse than seeing their red, inflamed little butt!!

GoodA+D diaper rash cream
Based on friends' recommendations, I purchased A+D diaper rash cream before C was born.  I've used it on diaper rash once before, and it seemed to work pretty well, although I had nothing to compare it to.  

Better: Triple Paste 
C got a bad diaper rash this week after a little stomach bug resulted in a LOT of diaper changes.  When I spoke to our pediatrician's nurse, she recommended Triple Paste.  We went out and bought some yesterday, and it is much, much thicker than the A+D cream, which forms a better barrier against moisture.  It puts the A+D cream to shame!  Of course, it does cost about twice as much, but when you have a baby with diaper rash, nothing is too expensive to make it go away faster!!

Monday, November 3, 2014

Easy Giant Nachos

I don't know that you can call this a "recipe", but more of an "idea" when you need a quick and easy lunch or dinner that you can make with mostly stuff you already have sitting in your pantry or refrigerator.   It's especially great for kids or teenagers...or just two adults who like to eat like kids or teenagers :)   We love to make these for dinner while watching Aggie football on TV!  I usually have most of the ingredients on hand, and it's a great way to use up leftover refried beans, chicken, or steak (that's usually what prompts me to throw this into the dinner rotation!).


Easy Giant Nachos

Yield: it depends how many you make :) I usually make 2 or 3 per person
Cook Time: 8 minutes

Ingredients (quantities are variable based on how many you're making):

1 package tostada shells*
1 can refried beans (I use fat-free)
1 package grated cheddar cheese

Mix-and-match ingredients (based on what you prefer, or happen to have on hand):
1 jar diced jalapeno peppers
Grilled chicken breast or steak, chopped
Avocado, diced
Sour cream
Shredded iceburg lettuce
Tomato, diced
Salsa

*These come in 2 types of package in the grocery store - they're in the aisle with the taco shells and other Mexican ingredients.  I like the kind in the bag, when I can find it - I think they taste fresher.  Here's what to look for:
 

Directions:

Preheat the oven to 400 degrees.  Arrange the tostada shells on the cookie sheet so that they're not touching or overlapping.  Use a knife or angled spatula to spread a layer of refried beans on each tostada shell (this is the "glue" for the rest of the ingredients).  Top each nacho with chopped chicken/steak and diced jalapenos (if using).  Sprinkle grated cheese on top of the nachos (putting the cheese as the top layer helps to secure the toppings to the nacho!)

Bake in the oven for 8 minutes or until cheese is melted.  Remove the pan from the oven and top the nachos with whatever cold ingredients you've chosen - tomatoes, avocado, lettuce, sour cream, salsa, etc.  Serve while warm.  Enjoy!

09 10