Thursday, October 30, 2014

Friday Favorites

I'm linking up with MomfessionalsGrace and Love, and A Little Bit of Everything to share my Friday favorites!


1.  Lemon Oreos

I have not bought a package of Oreos in YEARS, so I'm not sure what made me buy these....but OMG they are so good!  Do you remember when the Girl Scouts sold Lemon Pastry Cremes back in the day?  And then for reasons unknown they STOPPED MAKING THEM?  These lemon Oreos are almost the same!

2.  Boot Weather

It's the last day of October and it may FINALLY be boot weather in Dallas!  It has been an unseasonably warm fall, which has just delayed my favorite footwear season.  I'm excited to see highs in the 60's, low's in the 30's, and know that all of my knee-high boots can come out of their boxes soon!

3.  C's First Halloween

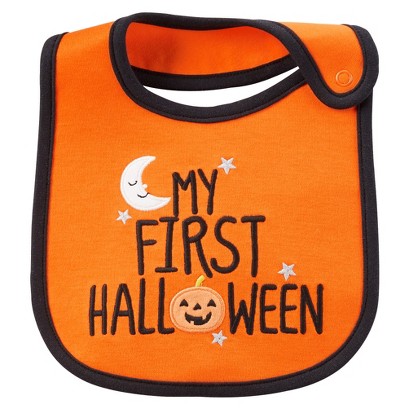
Is there anything cuter than a baby in a Halloween costume?!  I'm so excited for C's first Halloween!  I'm also discovering the joy that is holiday-themed baby apparel and accessories!  My college roommate's parents and my mother-in-law gave C these two bibs for Halloween - so cute!

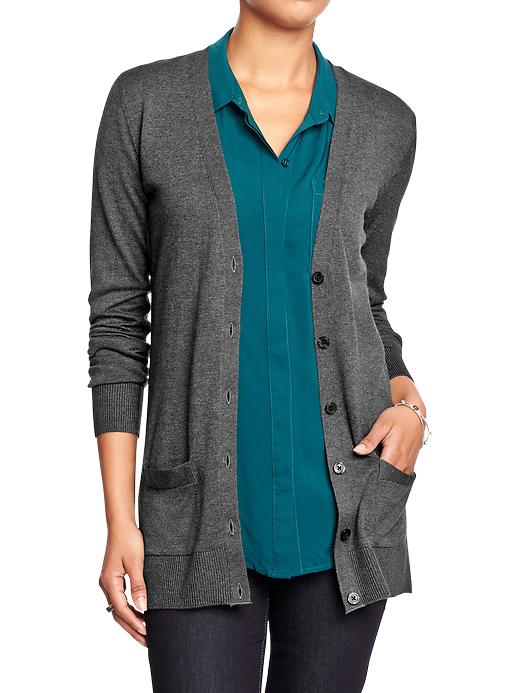
4. Old Navy Boyfriend Cardigans


I picked up 2 of these boyfriend cardigans from Old Navy last week, because I'd been needing new black and tan cardigans, and these were on sale for 50% off (less than $15!!)  They are long enough to look cute with skinny jeans, super soft, and come in a bunch of colors....and the reviews online are great!  I haven't washed mine yet, but hopefully they wear well!

Baby 101: What We Take to Day Care

Just when I'd gotten comfortable with what we'd need to leave the house....I went back to work and Carter started day care.  This introduced a whole new series of questions about what he would need, since the day care has rules against things we normally use (swaddles, pacifier clips, etc.) and it would be the first time that Carter has to nap somewhere other than his crib.  I asked around to friends of mine who are working moms, as well as consulted the daycare staff, to determine what to buy and pack for Carter each day. After 3 weeks, we're in a pretty good routine and I've figured out what he needs each day.  Here's what works for us:


1.  Daycare bag

I don't send my main diaper bag to daycare, since it has way more stuff in it than he needs at daycare; we use a monogrammed seersucker backpack as his daycare bag to transport his stuff each day.

2.  Bottle cooler

We use a matching seersucker lunchbox cooler to transport Carter's bottles to daycare each morning.  Some bottle coolers are too small to hold 4 bottles, or too short to hold bottles with the nipples and caps on (our daycare requires bottles to be fully pre-prepared), so make sure the bottles fit in the cooler you buy!

3.  Gerber First Essentials bottles

These bottles are cheap, cheap, cheap and Carter takes them, so these were a no-brainer for us; there's no sense in using expensive bottles if the cheaper ones work!  We have 12 of these bottles, which is 3 days' worth in case we get behind in bottle washing at night.
4.  Diapers
Our daycare requires us to provide our own diapers (some daycares we interviewed provide diapers for an additional monthly fee, but this one doesn't).  I send a jumbo pack at a time, since they store them in small cubbies for each child (there isn't enough space to send a giant box); they notify us when we need to restock his diaper supply.

5.  Ice pack
We use the Medela ice pack in his bottle cooler to keep the milk cold!

6.  Bottle Cap (and other stuff) Labels
I ordered these personalized Inchbug Mini Rectangle labels to label the plastic caps on Carter's bottles (as well as anything else plastic, like the ice pack in his cooler).  They're just stickers but they don't fade or fall off in the dishwasher.

7.  Bottle Labels
We use these Orbit personalized rubber-band style bottle labels for Carter's bottles; they are embossed with his first and last name so there's no confusion in the fridge at daycare!  These are more durable than writing his name on his bottles using a Sharpie, which can wash off over time.  We have 8 labels total (4 for bottles and, in a few months, an additional 4 for containers of pureed baby food, since I plan to make my own baby food).
8.  Pacifier
Carter take a pacifier at naptime and prefers MAM pacifiers; this pacifier will be dedicated to daycare use, so it will stay in his daycare backpack.  Our daycare doesn't allow pacifier clips.

9.  Wipes and Reusable Wipe Box
We sent a reusable wipe box, which allows us to refill it using the giant packages of wipe refills instead of constantly buying wipes in boxes (which are more expensive).

10.  Clothing Labels
I ordered these personalized Inchbug Tag Pals clothing labels to label Carter's sleepsacks and extra outfits; they're just a sticker that you put on the clothing tag, which seemed easier than the iron-on or sew-on variety, and they don't come off in the laundry.  I don't label all of his clothes (that he wears to daycare each day) - just the extra outfits in his backpack and his sleepsack in case it gets mixed up with other kids' stuff.

11. 2 pairs socks
We send Carter to daycare wearing socks everyday, but I have 2 extra pairs in his backpack in case they fall off and get lost or get dirty.

12. 2 extra outfits
I pack 2 extra weather-appropriate outfits in Carter's daycare backpack in case of diaper blowouts or excessive spitup.  I keep them in a Ziploc bag that they can put his dirty clothes in if they have to change him!

13. Halo Sleepsack
For SIDS/liability reasons, our daycare does not allow swaddling during naptime; only zip-up sleepsacks (with the baby's arms out) are allowed.  We bought 3 cotton Halo sleepsacks to rotate between daycare and home (so we can always have 1 for daycare, 1 at home, and 1 in the laundry).  We also bought 3 fleece sleepsacks for the winter.

14. A+D Diaper Rash Ointment
We sent a tube of A+D diaper rash cream to keep at daycare in the event he gets a diaper rash; sending it upfront to keep on hand at daycare is easier than remembering to go out and buy a new tube when he gets a rash!

Our daycare provides crib sheets, bibs, and burp cloths, so I don't need to send those - but every daycare is different, so check to see what yours provides in order to determine what to send!

Monday, October 27, 2014

Favorite Things Under $10 - Drugstore Beauty Edition

Today I'm linking up with Momfessionals and A Little Bit of Everything to share my favorite things under $10!


This month, my favorites under $10 are all beauty products you can find at your local drugstore.

1.  St. Ives Timeless Skin Collagen Elastin Moisturizer

Collagen Elastin Facial Moisturizer
I love this St. Ives collagen facial moisturizer.  I have oily skin, so it is hard to find a good moisturizer that doesn't just make my face look and feel greasy.  I also hate spending $30 on a bottle of moisturizer that I'll go through in a month.  This comes in a giant tub (I've had the same one for at least 6 months), absorbs quickly, and isn't too thick and heavy.  Does the collagen actually do anything? Who knows.  But I like the way it makes my face feel.

2.  Pond's Evening Soothe Makeup Remover Wipes

POND’S® Evening Soothe Wet Cleansing Towelettes

These Pond's makeup remover wipes in the "Evening Soothe" chamomile and white tea scent are the best.  I've never been a huge fan of makeup remover wipes, but I had a travel sized pack of these that I took to the hospital when Carter was born, and they are the BEST.  They seriously smell SO GOOD.  I definitely got addicted to using makeup remover wipes based on the scent alone....and they're good at taking off makeup too.

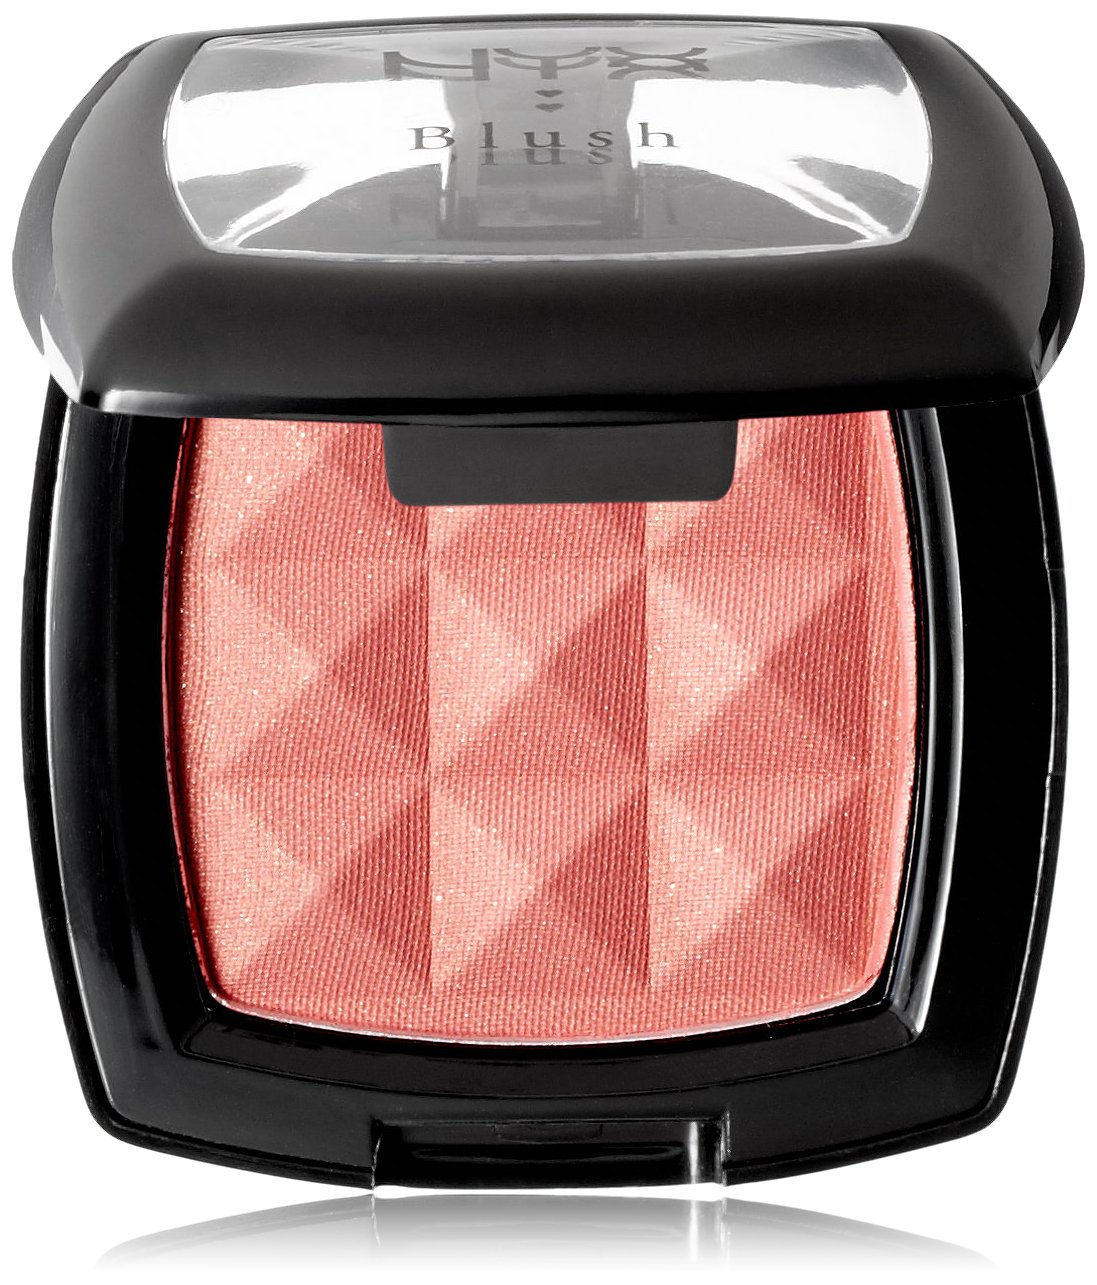
3.  NYX Blush in "Pinched"


I bought this NYX blush in the "Pinched" shade this summer based on reviews I'd read online that said it was a pretty close match for the infamous NARS 'orgasm' blush.  I'm too frugal to spend $30 on NARS blush so I can't say whether it's actually a close match, but I do really like this blush. 

4.  Essie Good to Go Top Coat


Essie's Good to Go Fast Dry High Gloss Top Coat does exactly what it claims to - it helps nail polish dry super fast and is really shiny.  It's the perfect top coat.  I've tried lots of other brands, but this one is by far the fastest drying and the shiniest.

From the Kitchen: Easy Stromboli

Stromboli was a staple dinner item in our house growing up, and it remains a popular dinner choice in my house now!  It is a great casual meal to feed a crowd, because you can double, triple, or quadruple the recipe and it really doesn't take any longer than making a single recipe, since the prep time is mostly assembly.  I've made it in multiple big-group settings, like ski trips and family gatherings, and it's always a crowd-pleaser.  I've also made it several times for friends with new babies, especially since it is just as good reheated (or cold!) the next day as it is fresh out of the oven!  I usually double the recipe when I make it at home just so we can eat the leftovers for lunch!


Easy Stromboli

Yield: 1 Stromboli (feeds 3-4 people)
Cook time: 25 minutes


Ingredients:

1 loaf frozen bread dough*
¼ lb hard salami, thinly sliced
¼ lb deli ham, thinly sliced
½ tsp dried basil
½ tsp ground oregano
¼ lb sliced provolone cheese
¼ lb shredded mozzarella cheese
2 Tbsp butter
4 Tbsp yellow cornmeal
*this is frozen RAW bread dough.  I always buy it at Kroger (it's the Kroger brand) in the freezer section with the rolls and bread. It comes with 5 loaves in a package.  I think it's called "Homestyle".

Directions:

Thaw the frozen bread dough (follow the thawing directions on the package; you can thaw it all day in the refrigerator or in a few hours on the counter). 
After the bread dough is thawed, use your hands to flatten it into a rectangle on a greased cookie sheet (approximatey 12x18”).  Layer the salami, ham, and provolone and mozzarella cheeses in a row down the center (this should take up the center 1/3 of the bread dough rectangle).  


Sprinkle the basil and oregano on top of the meat and cheese. 


Fold the sides of the bread dough toward the center, using your fingers to seal the 2 sides together.  Also fold over and seal the 2 ends to fully seal the ingredients inside the stromboli (otherwise they will leak out when you bake the stromboli).  Brush the outside of the stromboli with melted butter and sprinkle with yellow cornmeal.  Flip the stromboli over and do the same on the other side. 
Bake at 350 for 20-25 minutes or until lightly brown on top. 


Remove from the oven and slice into pieces about 1.5 inches wide.  Enjoy!


Thursday, October 23, 2014

Friday Favorites - Trader Joe's Edition

I'm linking up with MomfessionalsGrace and Love, and A Little Bit of Everything to share my Friday favorites!


Trader Joe's is still relatively new to Dallas, and I don't shop there that often, but I've discovered a few favorites that I'll go there especially to stock up on:

1.  Coconut Oil


At $5.99, Trader Joe's has a great price for coconut oil - especially since it's organic!  I've used it for Carter's diaper rash, as well as in baking.

2.  Pizza Dough


Trader Joe's pizza dough is great for a quick dinner - I've tried all 3 varieties (plain, wheat, and garlic & herb), and they're all great!  It usually runs about $1.29.

3.  Frozen Brown Rice


We always eat brown rice instead of white rice, but brown rice is such a pain to cook - it takes forever!  I love this frozen, pre-made brown rice.  A box comes with 3 pouches; just microwave the pouch and in 3 minutes you have perfect, ready-to-eat brown rice!

4.  Hummus

Pretty much all of the flavors of hummus I've tried are delicious - I especially like the unique flavor of this Cilantro and Jalapeno hummus!

5.  Grigio Luna Pinot Grigio

Inexpensive, drinkable red wine is a lot easier to find than white wine....but this $5 pinot grigio is perfect for weeknights when I can't justify opening a $15 bottle.  

6.  Pumpkin Bread Mix

Someone brought us pumpkin bread made with this mix after Carter was born...it makes some very delicious pumpkin bread!!

7.  Cookie Butter


This stuff is seriously delicious....I will not allow myself to buy a jar of it on principle, because I know it would last about 3 hours in my house.  However, I try samples of it every time they're offered at Trader Joe's because it is sooooooo good.

Baby 101: What's In My Diaper Bag... 0-3 Months

During the last few weeks of my pregnancy, I scoured the internet for lists of what needed to go in my diaper bag for my newborn.  I have a Petunia Pickle Bottom Boxy Backpack, which I love, mostly because it has both a shoulder strap and backpack straps.  I like the backpack straps when I'm carrying the infant carrier but prefer the shoulder strap when I'm using the snap-and-go stroller frame, because it fits over the stroller handles.  

Here's what's in my diaper bag right now...


1.  Diapers

Obviously.  I try to keep 4-5 diapers in my diaper bag at all times.  We like Huggies Little Snugglers or Pampers Swaddlers.

2.  Baby Wipes

My diaper bag came with a travel baby wipe container, but if not, I'd need one of those too. We love Huggies Natural Care wipes

3.  Vaseline

At first we used this to care for our son's circumcision, and now I keep it on hand in case diaper rash starts to show up.

4.  Hand Sanitizer

I love the Purell jelly wrap because I can hang the hand sanitizer on the outside of the diaper bag for easy access.

5.  Disposable Diaper Bag Dispenser

Similar to the bags you use for dog poop....these Munchkin bags are lightly scented and handy when you're disposing of a dirty diaper at someone's house or in a public place.  Also handy to have hanging on the outside of the diaper bag!

6.  Extra Outfit

In case of blowouts...I just have to remember to make sure to keep the size of the outfit up to date!  I think there's still a newborn size onesie in there!

7.  Wet Bag

To contain soiled clothes from aforementioned blowouts...I have the Itzy Ritzy wet bag.

8.  Muslin Swaddle Blanket

Handy to use as a blanket, to cover the carseat (to keep strangers at Starbucks from touching him!!), or on the floor to lay baby down on.  We love how soft the Aden + Anais muslin swaddle blankets are!

9.  Nursing Cover

Some people are brave enough to nurse in public without a nursing cover, but I'm not one of them.  I prefer to keep things covered and like how the Itzy Ritzy nursing cover is lined so it doesn't blow around in the wind like thinner nursing covers do!  

10.  2-3 Burp Cloths

My son is a major spitter-upper...I need 2-3 burp cloths for EVERY trip out of the house.  I like Aden + Anais burp cloths or 6-ply Gerber cloth diapers (they're so absorbent!)

11. Disposable Nursing Pads

I use re-useable nursing pads on a regular basis but keep a pair of disposable nursing pads in the diaper bag for emergencies.  I like the Lansinoh brand the best.

12.  Stroller Toy

A stroller toy is key for entertaining a fussy baby.  

13.  Pacifier

I always double check to make sure there's a pacifier in the diaper bag before leaving the house - I think that's a mistake you only make once :)  My picky baby will only take the Mam brand.

14.  Pacifier Disinfecting Wipes

Being in public without a useable pacifier is the kind of thing that gives me nightmares.  We got the Gumdrop brand as a baby shower gift and they work great!

15.  Snack for Mom

Because mom doesn't always have time to eat lunch at a reasonable hour, and also because breastfeeding makes me ravenously hungry.  I feel OK about Kind bars since they're protein-filled and actually filling enough to stave off the hunger pangs.  I have yet to try a flavor I haven't liked, but my favorite is the Apple Cinnamon Pecan.

16.  Bottled Water

Similar to #15, breastfeeding also makes me crazy thirsty!


Tuesday, October 21, 2014

Home Improvement: Interior Door Replacement


Our home was built in the early 1970's, and, when we bought it, it had ugly mismatched interior doors and doorknobs.  Of the 13 interior doors in the house, 10 were the original, flat-panel interior doors.  Luckily, at some point in the past, a previous owner had the good sense to at least paint the wood color white, so they were slightly less hideous (although you could still clearly see the texture of the wood grain through the paint).  The remaining 3 doors were a newer, 6-panel style, which were fine except that they didn't match the rest of the doors.  The doorknobs weren't any better; they were a variety of styles and colors (all bronze or gold).  

Old doors + brass hardware + green carpet + baby blue paint...this house was a dream
Although we hated the interior doors, it wasn't a top priority for our renovation budget; as a temporary, inexpensive fix, we removed all of the doorknobs and spray painted them oil-rubbed bronze (we used this Rustoleum paint) so that at least they would match and be a more "current" color for door hardware.  This worked great -- for the 3 years that we lived with the old doors, the spray paint didn't chip or wear off at all.

The same room after replacing the carpet, painting the walls, and spray painting the doorknobs oil-rubbed bronze
3 years after moving into our home, after completing higher priority projects like gutting the kitchen and renovating the master bath, we finally decided to replace the interior doors.  Although this project wasn't one that we're likely to get our money back on upon resale, the dated appearance of the interior doors drove us crazy on a daily basis, so we opted to make the update for cosmetic purposes.  

I did a bunch of Googling to try to determine the best way to go about this project, as well as get a cost estimate, and didn't come up with much...so I hope this information helps someone else who might be considering replacing the interior doors in their home!

Ordering the Doors and Solid vs. Hollow-Core

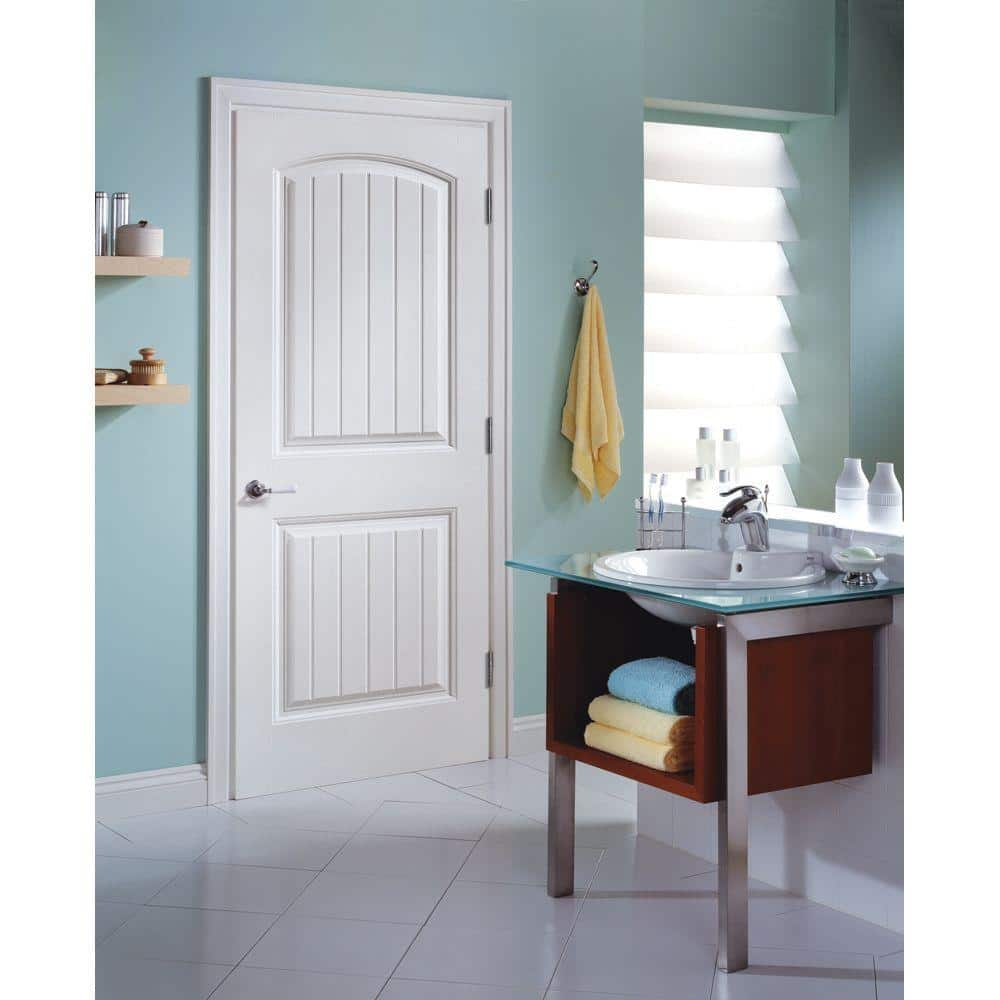
We selected a Masonite Cheyenne 2-panel plank door; we priced them out at several different retailers and wholesalers and found that they were least expensive to order directly from a local plywood company.  We ordered 5 solid-core doors and 8 hollow-core doors; the solid-core doors are more soundproof but cost nearly three times as much as the hollow-core doors, so we opted to install solid-core doors only on the bedroom doors and the hallway door, to cut down on noise transmission while the kids are asleep.


Source
Door Installation

We wanted to replace the doors only (rather than the doors and the frames) to save on costs, since slab doors are less expensive than pre-hung doors.  Because our house is over 40 years old and has settled over the years due to the north Texas soil, many of the door frames were no longer completely square.  This meant that the door replacement wasn't a DIY job - we needed a professional who knew how to make the necessary adjustments to retrofit new doors into the existing door frames.  I contacted several handymen, but none of them wanted to take on a project this large or didn't know how to hang slab doors.  We got quotes from a couple of contractors we'd worked with in the past, but they were pricey because they wanted to install pre-hung doors.  Finally, we found someone local who specializes in door installation and was the right man for the job.

We ordered the slab doors unmortised and with no doorknob holes bored.  Our door installer mortised the hinges to match the placement of the hinges in the existing door frames and bored holes for the doorknobs to match the placement of the existing strike plates.  For the 5 solid-core doors, he also reinforced the door frame to accommodate the heavier weight of the solid-core doors (as the previous doors had all been hollow-core).  He did a great job; it took him 3.5 days to install the doors and reinforce the frames where necessary; in the end, he installed and adjusted all 13 doors to fit perfectly in the existing door frames.

Painting the Doors

Because the doors have a smooth finish (no faux wood grain like some doors have), we weren't brave enough to paint them ourselves, since we knew brush strokes would show every mistake.  The doors came pre-primed from the manufacturer; we hired a painter to paint the doors and the door frames (so that the color of the white paint would match).  We bought 3 gallons of Sherwin Williams ProClassic oil-based paint in Pure White.  The painter filled all the nail holes (where the door installer had to remove the trim to reinforce the door frames), caulked, and painted all 13 doors and frames over the course of 3 days.  The painted doors look great - we hadn't realized how yellowed the white paint on the old doors had become until we saw how bright and clean they looked with fresh paint.

Replacing the Doorknobs

We finished off the project by purchasing all new lever-style door handles in an oil-rubbed bronze finish.  We bought these at a local seconds/surplus store for much less than comparable styles at Home Depot or Lowes.

Project Cost

Interested in replacing your interior doors?  Here's the approximate cost:

8 hollow-core doors: varied between $29.95 and $35.24 each based on door width (bedroom doors are slightly wider than hallway, closet, and bathroom doors)
5 solid-core doors: $88.10 each
3 gallons oil-based paint: $46.89 each
13 lever-style door handles: $19.99 each
13 doors installation labor: base price $80 per door (extra for doors which had to be cut to size or frames reinforced)
3 days paint labor: $249/day

Monday, October 20, 2014

From the Kitchen: Andes Mint Chocolate Cake

I made this Andes mint chocolate cake for my dad's 60th birthday....and it was seriously probably the best dessert I have ever eaten.  If you're as obsessed with chocolate and mint as I am, you NEED this cake in your life...delicious chocolate cake, mint buttercream, rich chocolate ganache, and a chopped Andes mint garnish  We served it at room temperature on my dad's birthday, but I think it was even better served cold the next day.


Andes Mint Chocolate Cake

Adapted from Bird on a Cake


Ingredients:

Chocolate Mint Cake

1 cup boiling water
2 cups granulated sugar
1 3/4 cups all purpose flour
3/4 cup cocoa powder
2 teaspoons baking soda
1 teaspoon baking powder
1 teaspoon salt
2 eggs
1 cup sour cream
1/2 cup vegetable oil
1 teaspoon vanilla extract
1 cup chopped Andes mints


Mint Buttercream:

1 cup (2 stick) unsalted butter, room temperature
6 cups powdered sugar
1 teaspoon vanilla extract
1 teaspoon peppermint extract
4 drops green food coloring


Chocolate Ganache:

1 cup semi-sweet chocolate chips
1 cup heavy cream
1 teaspoon vanilla extract


Garnish: 

1/4 cup chopped Andes mints


Directions:

Chocolate Mint Cake:

Preheat your oven to 350 degrees.  Line the bottoms of 3 9-inch cake pans with wax paper and spray the sides of the pans with cooking spray.  Using a kettle or saucepan, start bringing some water to a boil so it will be ready to add to the dry ingredients later.

In a large mixing bowl (I used my KitchenAid mixing bowl), combine the sugar, flour, cocoa, baking soda, baking powder, and salt.  Stir together the dry ingredients, then add in the eggs, sour cream, vegetable oil, and vanilla extract.  Beat with an electric mixer (I used the KitchenAid paddle attachment) until well blended.

Add 1 cup of boiling water to the mixture and carefully stir with a spoon (don't use the electric mixer at first or you will splash boiling water all over yourself!)  Once it is incorporated into the rest of the mixture, beat the batter with an electric mixer for approximately 1 1/2 minutes.  Fold 1 cup of chopped Andes mints into the batter.

Pour the cake batter into the pans, dividing evenly between the 3 pans.  Bake for 18-20 minutes, or until a cake tester comes out clean.  Use a knife to release the edges of the cake from the pans and invert onto wire cooling racks to cool.


Mint Buttercream:

Using an electric mixer, beat together the butter, sugar, vanilla extract, peppermint extract, and food coloring.  (I don't measure powdered sugar when making buttercream - I just add sugar until it reaches the right consistency).


Chocolate Ganache:

Heat the heavy cream in the microwave in a glass measuring cup or bowl until it is simmering.  Pour the hot cream over the chocolate chips and allow it to sit for a few minutes, then carefully stir until all the chocolate chips are melted into the cream.  Add the vanilla and stir.  Allow the mixture to cool so that it will thicken; I left it at room temperature for a couple of hours and then moved it to the refrigerator to thicken it faster.


Assembly:

Place the bottom cake layer on a cake plate or turntable and frost the top with mint buttercream using an offset spatula.  Repeat with the remaining 2 layers, then frost the sides of the cake.  Pour the thickened chocolate ganache on top of the cake, using an offset spatula to spread the ganache over the top of the cake to the edges so that it drips down the sides of the cake.  Spinning the cake plate or turntable slowly, use the offset spatula to smooth the ganache around the sides of the cake to completely coat the mint buttercream.

Garnish the top of the cake with 1/4 cup of chopped Andes mints.  Allow the cake to stand at room temperature for at least 2 hours for the ganache to set.


Thursday, October 16, 2014

Friday Favorites

I'm linking up with MomfessionalsGrace and Love, and A Little Bit of Everything to share my Friday favorites!


1.  Grands Pumpkin Spice Cinnamon Rolls

My local Kroger had all their seasonal pumpkin-flavored foods in a special display at the front of the store - they know what they're doing with that marketing!  Of course I had to make an impulse purchase, and these pumpkin spice cinnamon rolls were the winner.  We made them last weekend and they were pretty tasty!

2.  Essie Bahama Mama Nail Polish


I love this dark plum color for the fall season!  I got a pedicure in this color last week and had to pick up a bottle at Target so I can wear it all season!

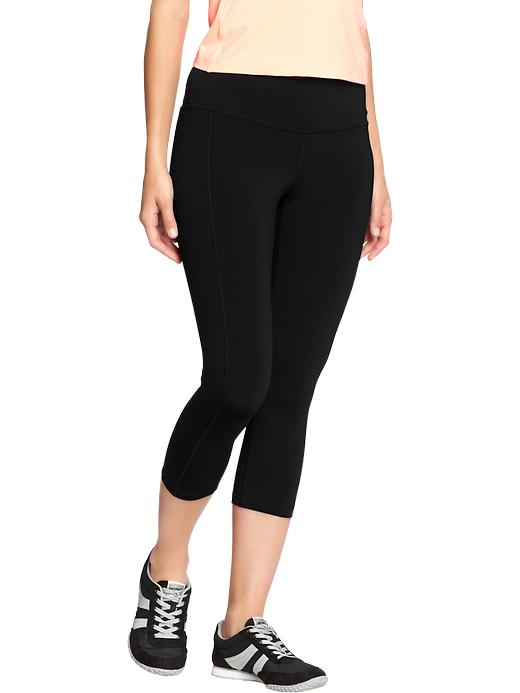
3.  Old Navy Compression Capris


Now that the weather is cooler, I've switched up my wardrobe for my walks with the baby, trading out my shorts for these Old Navy compression capris.  I LOVE these workout pants - I have 3 pairs and always find myself having to do laundry because they're all dirty.  They are form-fitting without being too tight, stretchy while still holding you in, super comfy, and best of all, they are completely opaque.  I have had way too many workout pants that become see-through when you bend over to stretch!

4.  Popovers


I love me a crunchy-on-the-outside, soft-on-the-inside, steamy, eggy popover!  Whether with brunch or dinner, popovers are a great addition to any meal.  Check out my favorite recipe here.
09 10