Supplies:
1" x 6" x 6' wood board (I bought this one from Home Depot for $8.78)
100-grit sandpaper
Wood stain (I used Minwax) or paint
Rags or brush for staining
Ruler
Black Sharpie
Painter's tape (I used Frog Tape)
Mechanical pencil with metal tip
Template for numbers - stencils or computer-printed numbers for tracing
Command Velcro strips for hanging
First up - prep and then stain or paint the wood board. Lightly sand the board using 100-grit sandpaper to even out any rough spots.
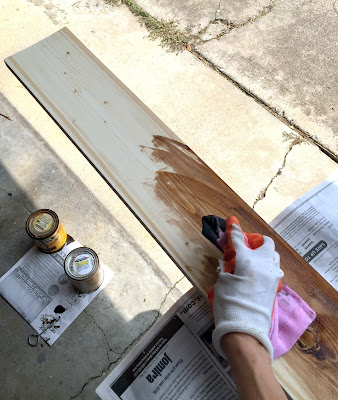
Apply the stain using some rags (specifically, my husband's old holey undershirts that I cut up into rags for projects like this), making sure that the front, top, bottom, and side edges were all evenly stained. I did not stain the back, since it won't be visible and it would have added to the drying time.
Let the board dry until it is no longer tacky to the touch (the can said this would take 4-6 hours; I let it dry overnight).
Once the stain or paint is dry, use a ruler and a black Sharpie to mark small dots along the edge of the board every inch.
Next, you'll mark the "foot" lines; to do this, first decide how high you want to hang the board. I decided to hang mine 6" above the floor (to allow room for the baseboard), so the "1 foot" line would be 6 inches (not 12) from the bottom of the board. This means that the board can be used to measure up to 6'6" in height overall. Apply Frog Tape down the length of the board so that all the lines would be the same length, with the foot lines being just shy of 1/2 the width of the board. Using a Sharpie, use a ruler to draw a line from the left edge of the board to the Frog Tape, beginning at 6" from the bottom of the board and every 12" thereafter.
After labeling the "foot" lines, move the Frog Tape approximately an inch closer to the left edge of the board to draw the "quarter" inch lines (e.g., 1/4 inch, 1/2 inch, and 3/4 inch), which are really 3 inches, 6 inches, and 9 inches from each "foot" line.
Finally, move the Frog Tape another inch closer to the left edge of the board to draw the "eighth" inch lines (e.g., 1/8, 2/8, 3/8, etc.), which are the 1, 2, 4, 5, 7, 8, 10, and 11 inch marks in between each "foot" line.
Print out a template for the number labels - I used Century Schoolbook font in size 275 in Microsoft Word. Using a mechanical pencil with a metal tip (with the lead pushed in so the metal tip was exposed), trace the outline of each number just beneath the applicable "foot" line by pressing the metal tip of the pencil through the paper; the wood should be soft enough that the pencil leaves a visible indentation.
Use the black Sharpie to trace over the indentation and color in the interior of the number.
I haven't hung my board yet since we're having the house painted next week, but I plan to use Command Velcro strips to hang it on the wall (the large size support up to 16 lbs, and the board weighs approximately 5 lbs). Follow the directions - including wiping the wall with isopropyl alcohol beforehand - exactly for best results!


No comments:
Post a Comment